
Banners are a proven visual element that grabs visitors’ attention instantly. They are usually placed at the top of any web post/page, showcasing striking visuals, compelling text, and clear call-to-actions (CTA).
However, you can place banners even in the middle part of the web posts and pages if you feel this can add value. It can help you effectively communicate key messages, highlight promotions, and direct users to important actions.
In this article, I will show a step-by-step tutorial on how to create a banner with buttons in Gutenberg WordPress. Get started!
How to Create a Banner with Buttons in Gutenberg WordPress
The default Gutenberg block editor doesn’t have any dedicated banner block. Still, you can create banners with the available blocks in its library. Let’s check it right away.
Step 01: Insert the Cover Block to the Editor
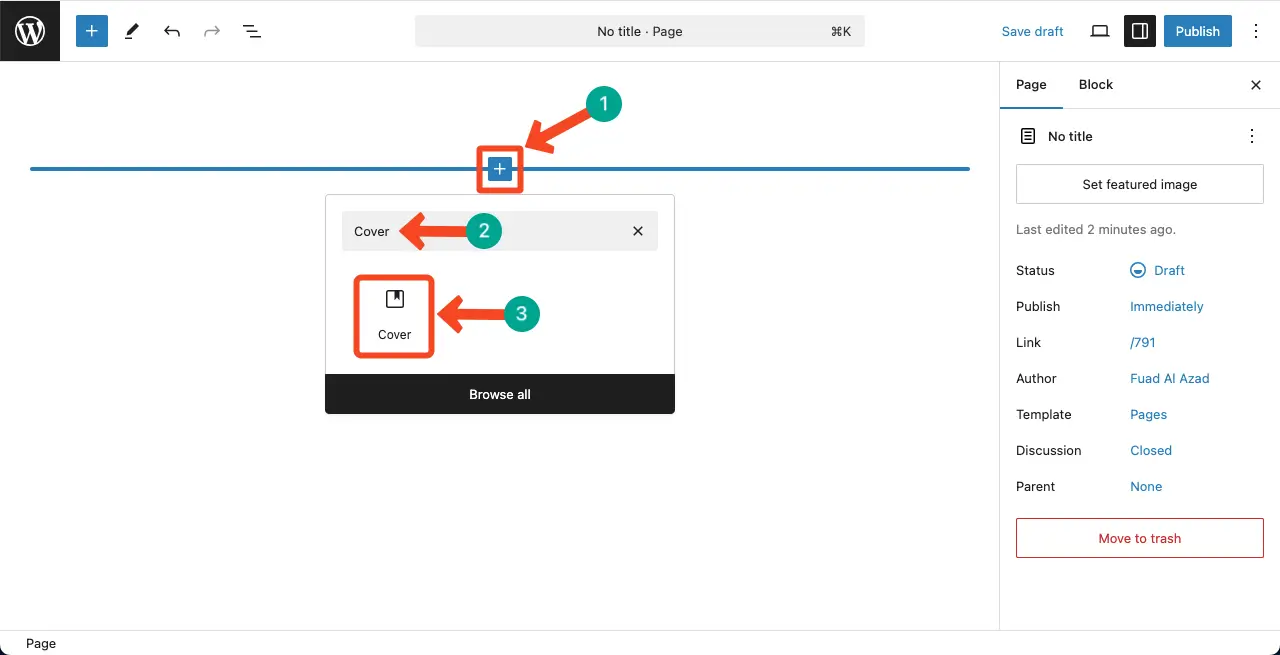
In the Gutenberg editor, click the plus (+) button to add a new block.
Search for Cover in the block search bar and select the Cover block.
Step 02: Add a Background Color or Image to the Block
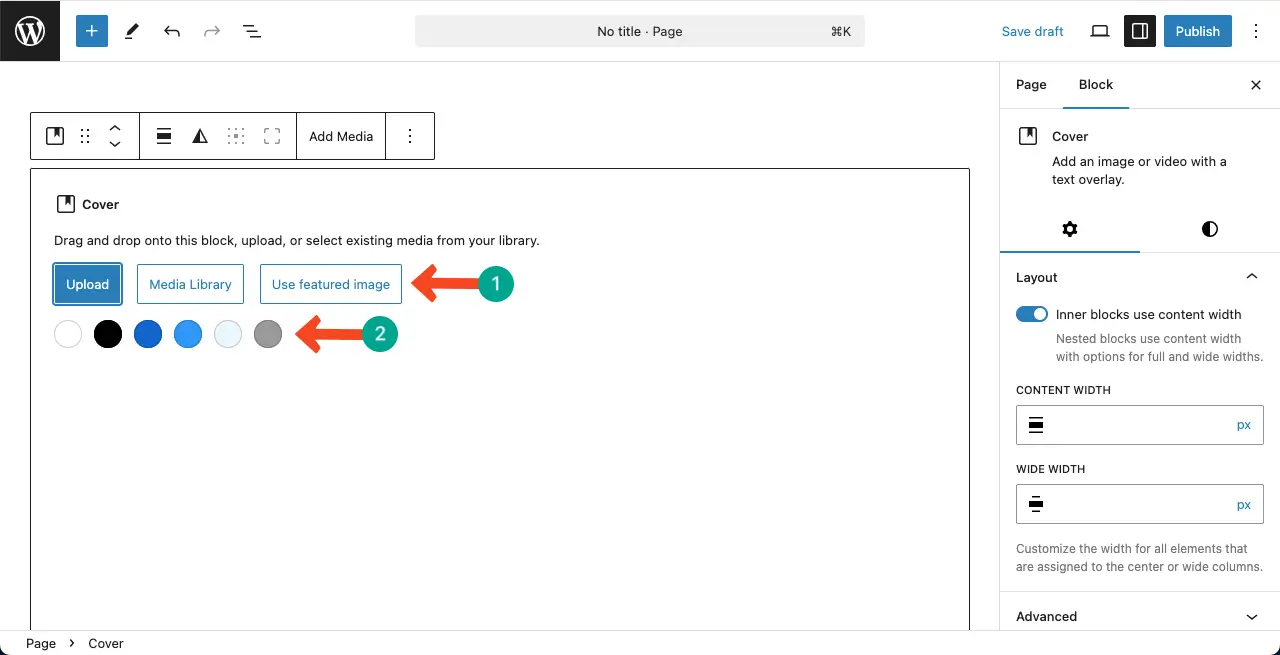
Once the Cover block is added, you’ll be allowed to add a color or image to the background.
To add an image as the background, click the Upload, Media Library, or the Use Featured Image option.
If you don’t prefer any image, you can select a solid color as the background.
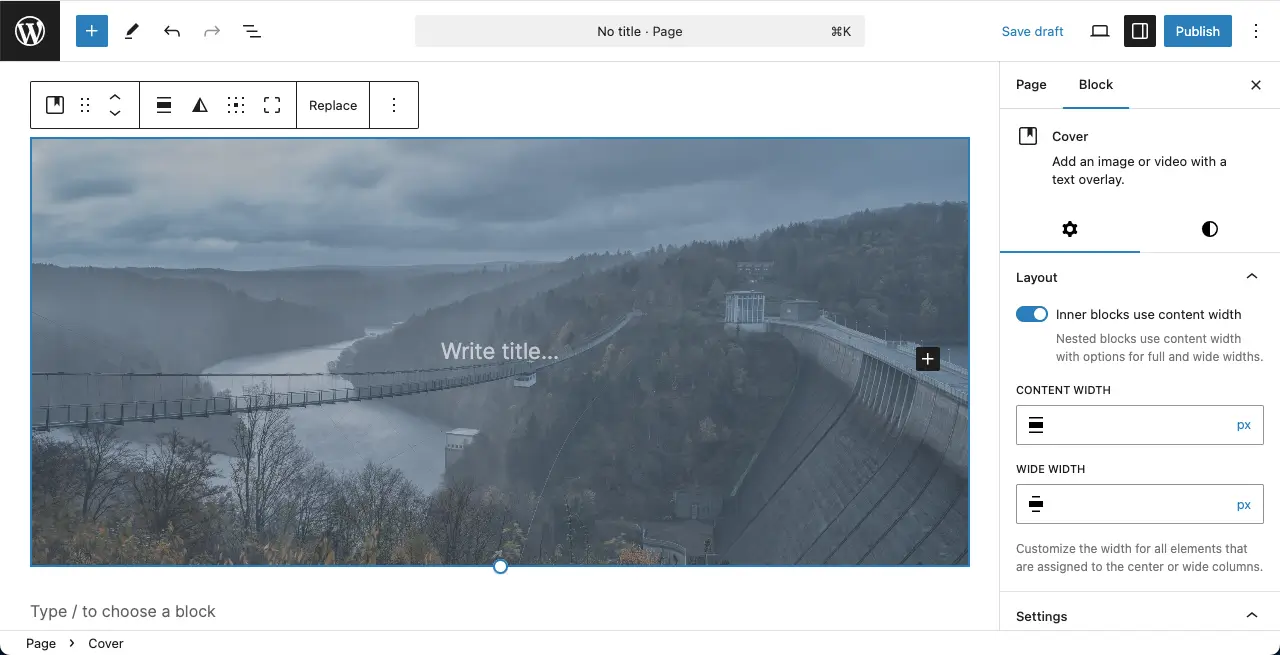
I have added an image for the banner background for the tutorial. You can see it below.
Here’s a tutorial on how to add advanced heading block to WordPress.
Step 03: Respecify the Position for the Banner Background Image
To change the image position in the banner’s background, come to the Focal Point option by scrolling the Settings tab on the right sidebar.
Using the Focal Pointer, you can move the image’s position on the banner background.
Otherwise, you can use the default background settings without touching the Focal Point option.
You can see two options above the Focal Point. They are Fixed Background and Repeated Background.
Take a look at how these options work in the clip attached below.
Check how to create a call to action block in WordPress.
Step 04: Add Content Over the Banner
The Cover block allows you to add all the other blocks on top of it. By default, it comes with the paragraph block at the top (as you can see, Write title…).
You can see I have added text over the banner. You can customize its color from the right sidebar.

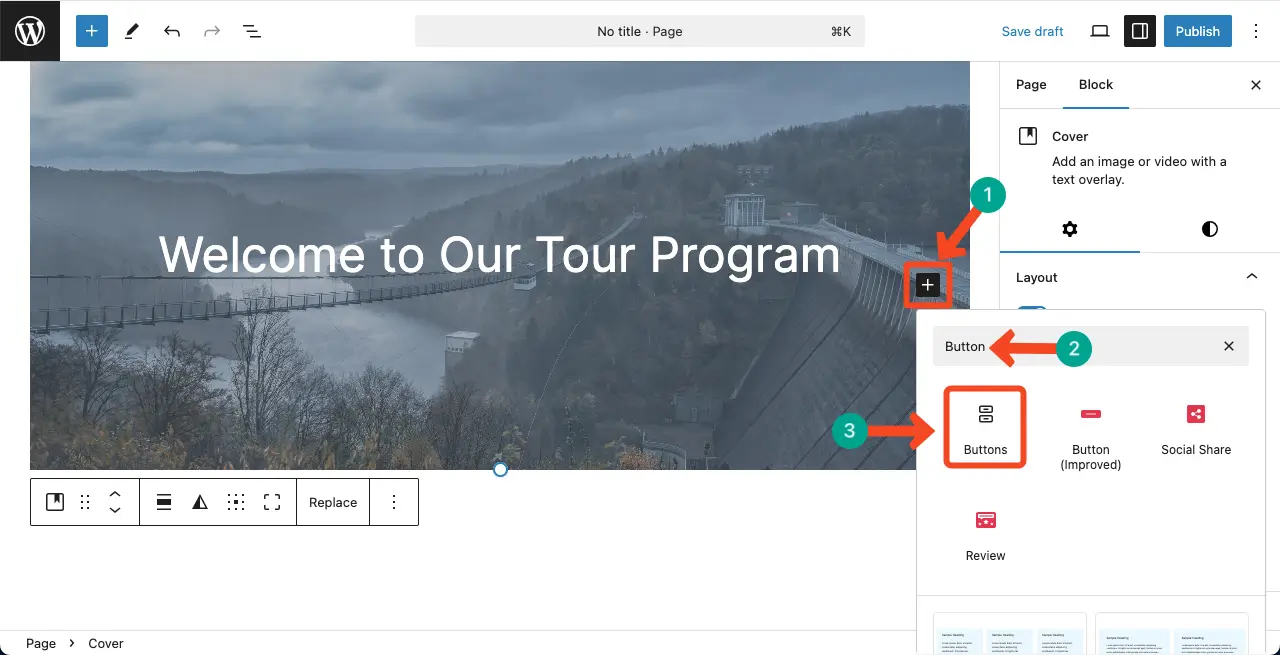
Step 05: Add a Button over the Banner
As said above, you can add any block over the cover block. Just click the plus (+) icon over the banner.
Type Button in the search bar. Once the button appears, add it to the banner as you do with any other block.
Explore this step-by-step guide on how to add and use the advanced text block in WordPress.
Step 06: Customize the Button on the Banner
After the button is added, align (left, center, or right) with the particular position in which you want to display it.
Next, add a copy to the button.
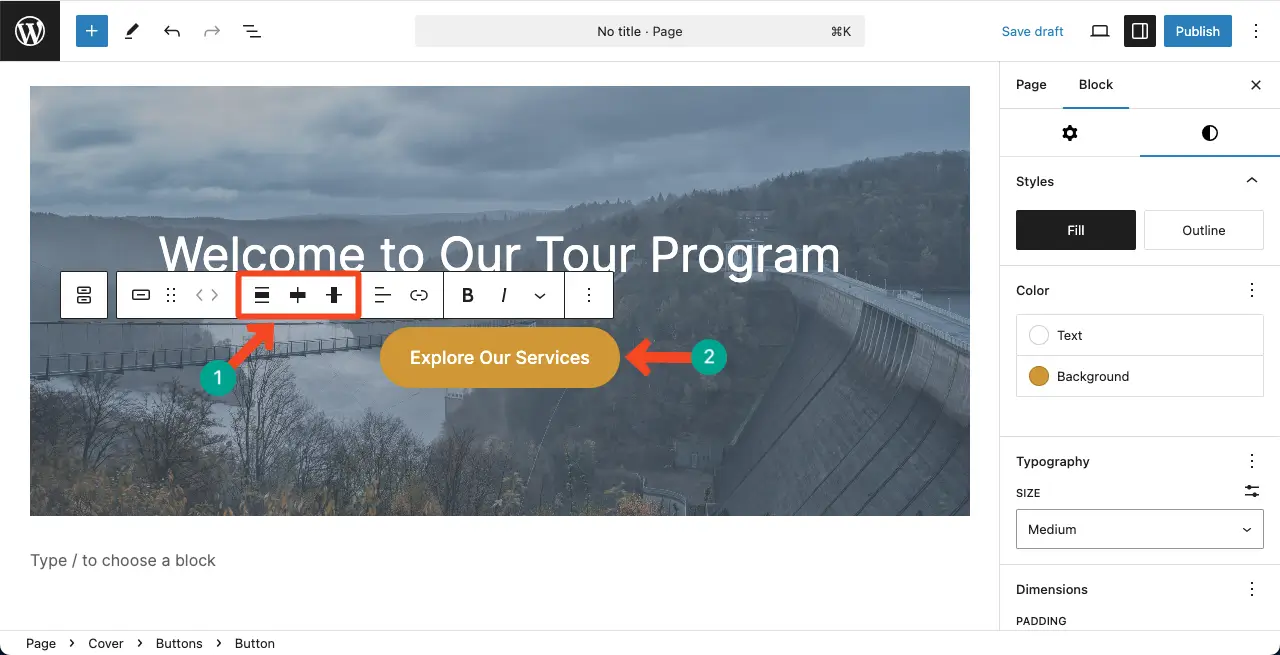
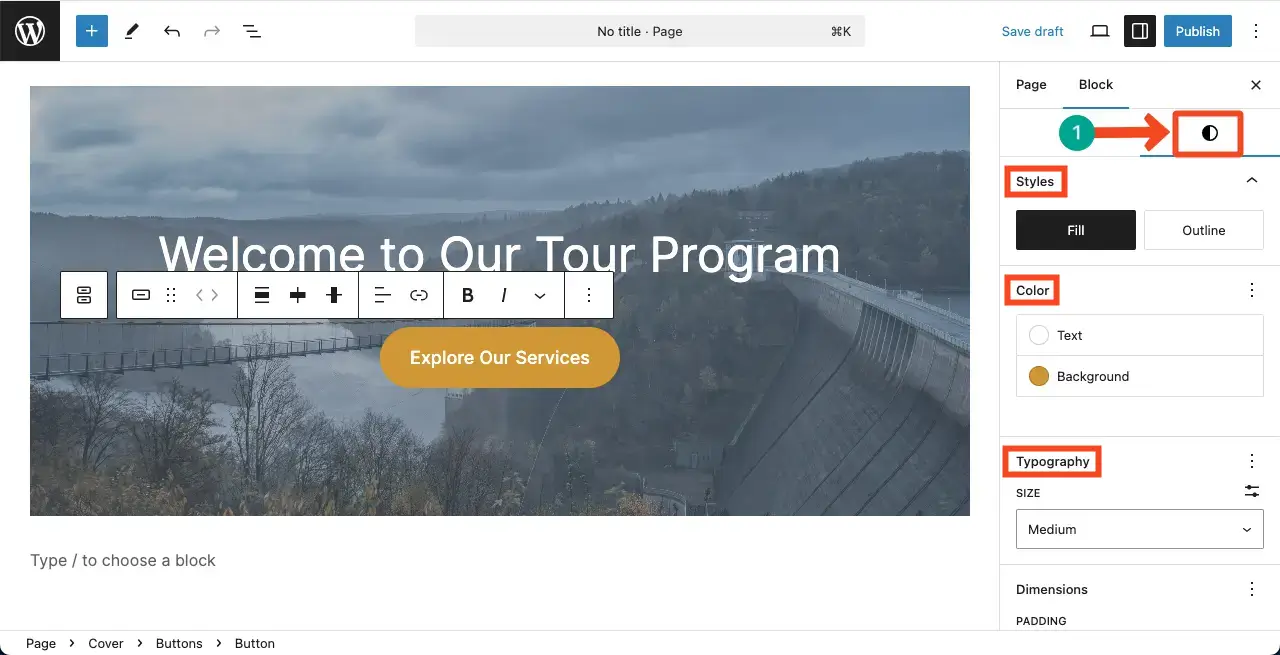
Go to the Styles tab on the right sidebar to stylize the button.
You can change button color, typography, font size, dimension, and more options.
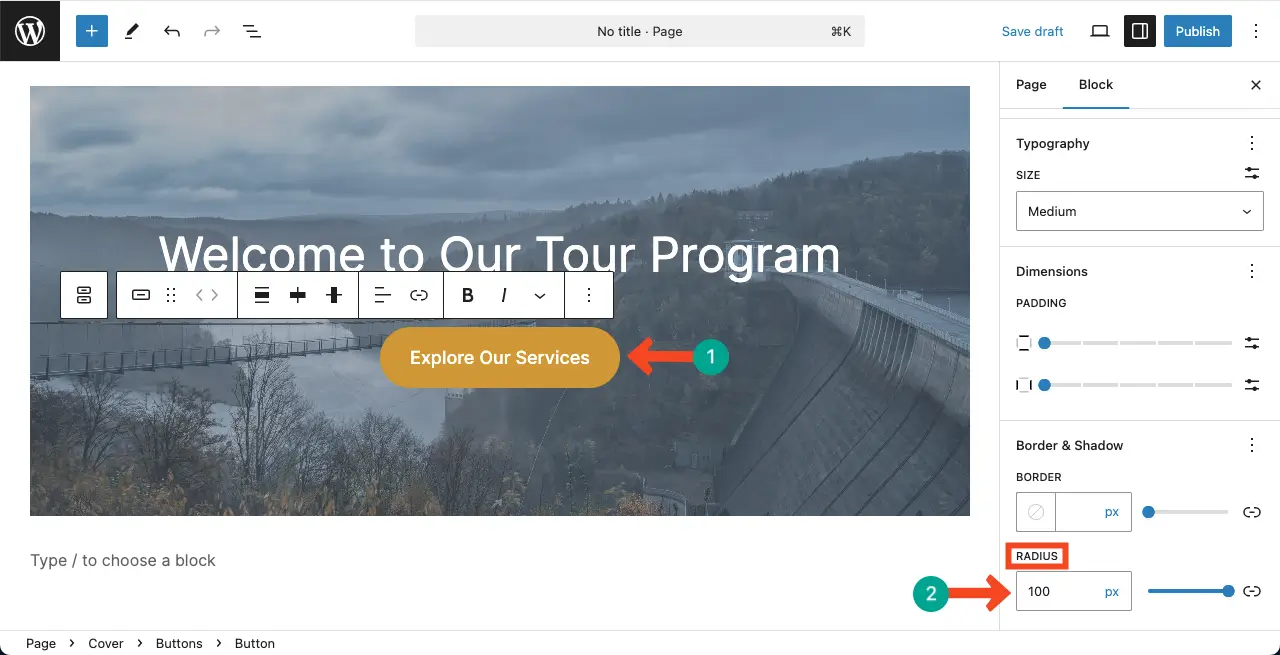
Coming to the end of the tab, you will see the Radius option. By placing a suitable value, you can create a curvy corner for the button.
Thus, you can keep adding more blocks and content to the banner as you require.
I’ve provided a basic overview in this tutorial to help you get started with the process. Hope you can do the rest yourself.
Best Practices to Follow When Creating a Banner on Your Website
Creating an effective banner on your website requires careful consideration to ensure it captures attention and drives action. Here are some best practices to follow when designing your banner.
Keep It Simple and Focused
Do not overload your banner with text or elements. Make the design simple, with a single, distinctive CTA or message. So, focus on a single message (a promotion, an announcement, or a featured item).
Use High-Quality, Relevant Images
The background image provides the ambiance for your banner. Make sure the image is professional, appropriate, and doesn’t drown out the words. Your images should help you convey, not detract from it.
Use Contrasting Colors
Colors should be consistent with your brand identity but distinct. Distinguish text and background to ensure readability (especially for CTAs such as buttons). A pop-up button with a CTA will be able to grab attention and make users click.
Be Consistent with Your Branding
Your banner should match the overall look and feel of your website. Apply brand colors, fonts, and graphic elements to keep the entire site consistent.
A/B Test Your Banners
Create various versions of your banner to find out what works best. So experiment with different text, layout, CTA, or imagery and see what gets the most engagement for your audience.
Conclusion
So, I am now at the end of this post. As said before, I have covered just the basics of how to create a banner in the WordPress Gutenberg editor. But if you want me to cover how to create a complex banner with so much art and design, let me know through the comment box below.
I will get back to you very soon with a viable solution. Till then, have a nice day and enjoy WordPressing.

