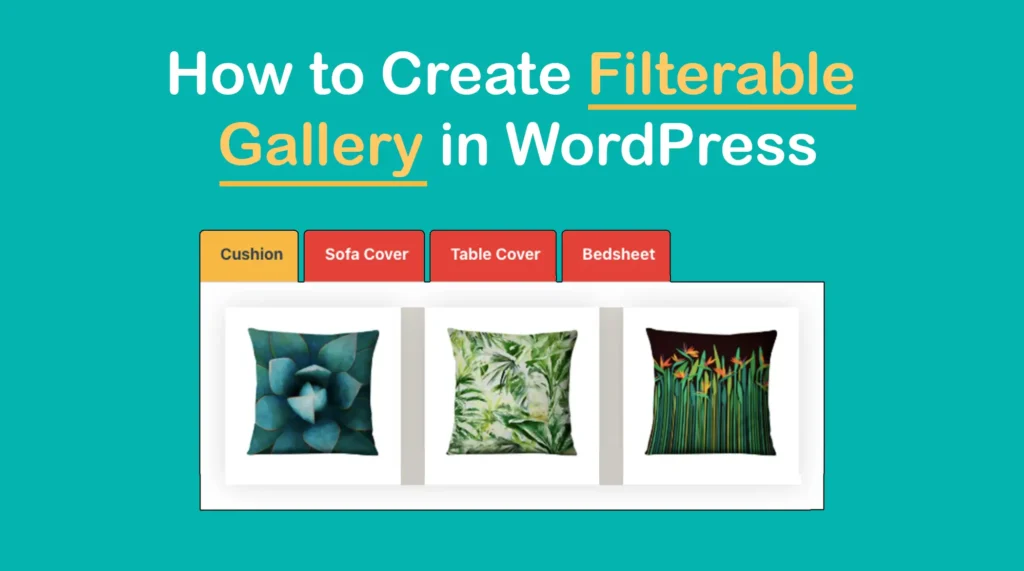
In the case of online content creation, visual appeal plays a crucial role in capturing visitors’ attention. Using a filterable gallery has been proven to give your website a more attractive and usable visual appearance.
It allows web visitors to sort and view images based on specific criteria to see exactly what they want. Whether it’s an eCommerce site or a portfolio website, you can easily showcase product photographs, artwork, and any graphical elements via this feature.
In this article, I will show how to create filterable gallery in WordPress on the Gutenberg block editor. Let’s get started!
How to Create Filterable Gallery in WordPress Gutenberg
The default WordPress editor doesn’t have any option to create a filtering system. So, you need an additional plugin to create such a one. In this case, you can consider the Ultimate Blocks plugin.
It’s a Gutenberg block plugin with over two dozen custom blocks by which you can create different types of content on the editor in many creative ways. It also covers a few blocks to create content filtering systems.
Go to Plugins > Add New Plugin. Type Ultimate Blocks in the search box. Install and activate it.
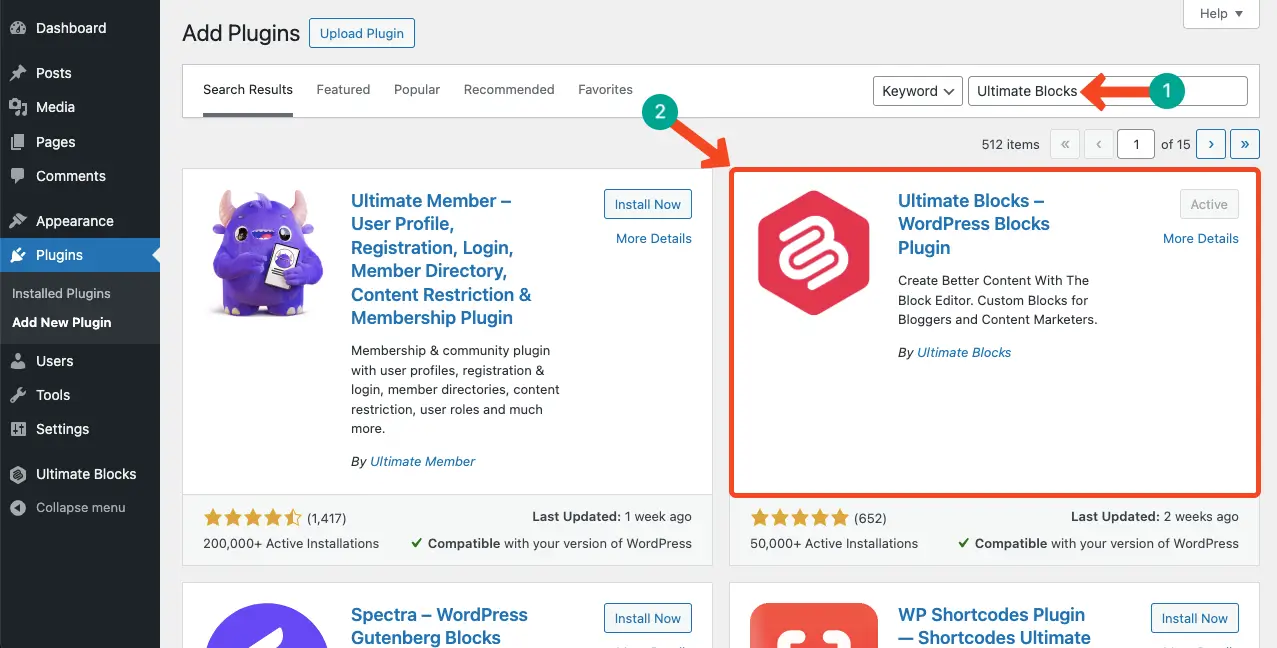
Once the plugin is ready on your site, start following the tutorial explained below.
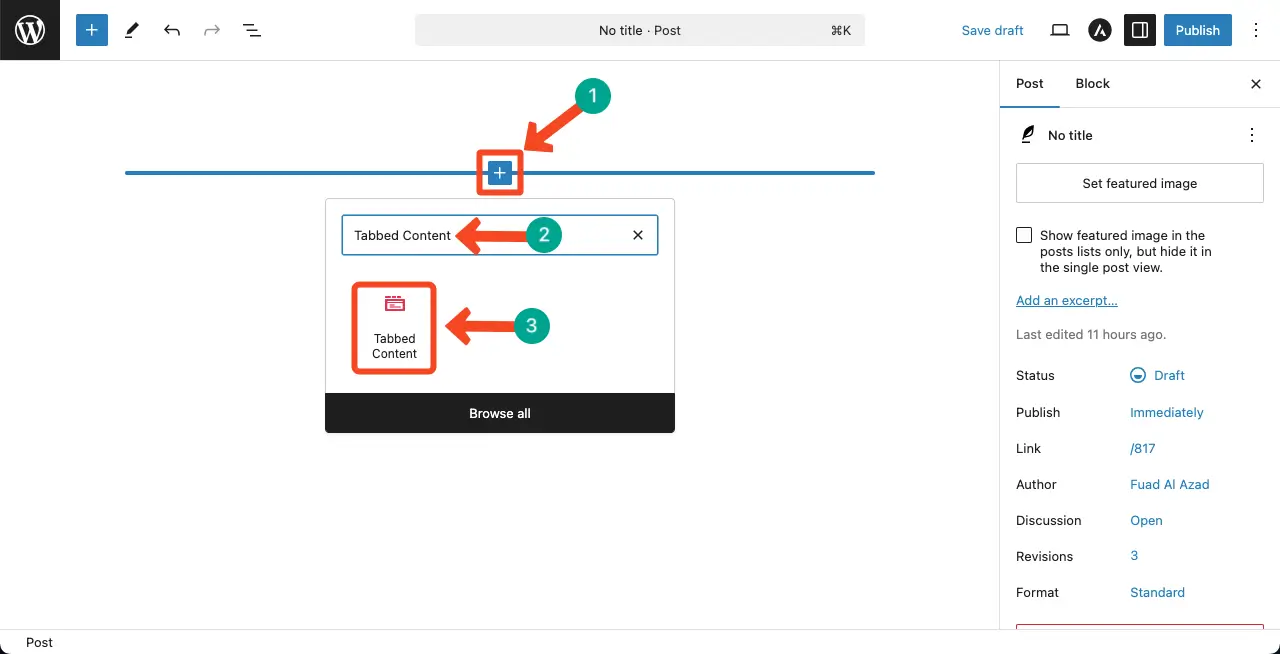
Step 01: Find and Add the Tabbed Content Block to the Editor
Tabbed Content is one of the most useful blocks of the plugin. Find and add it to the Gutenberg editor.
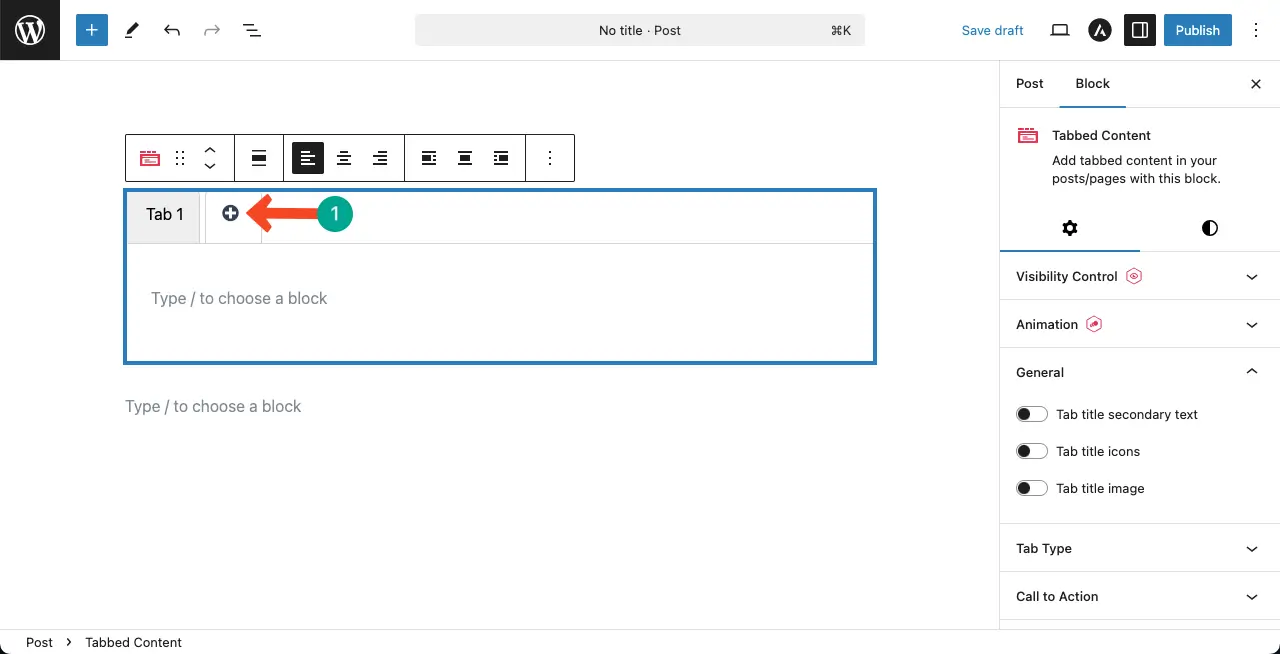
Step 02: Create New Tabs
Create as many tabs as you need by clicking the plus (+) icon on the tab.
# Name the Content Tabs
Place the cursor on the tabs. You’ll be allowed to rename them. You can see that I have created four tabs and renamed them.

Check how to add coupon code in WordPress.
Step 03: Add Gallery to a Tab
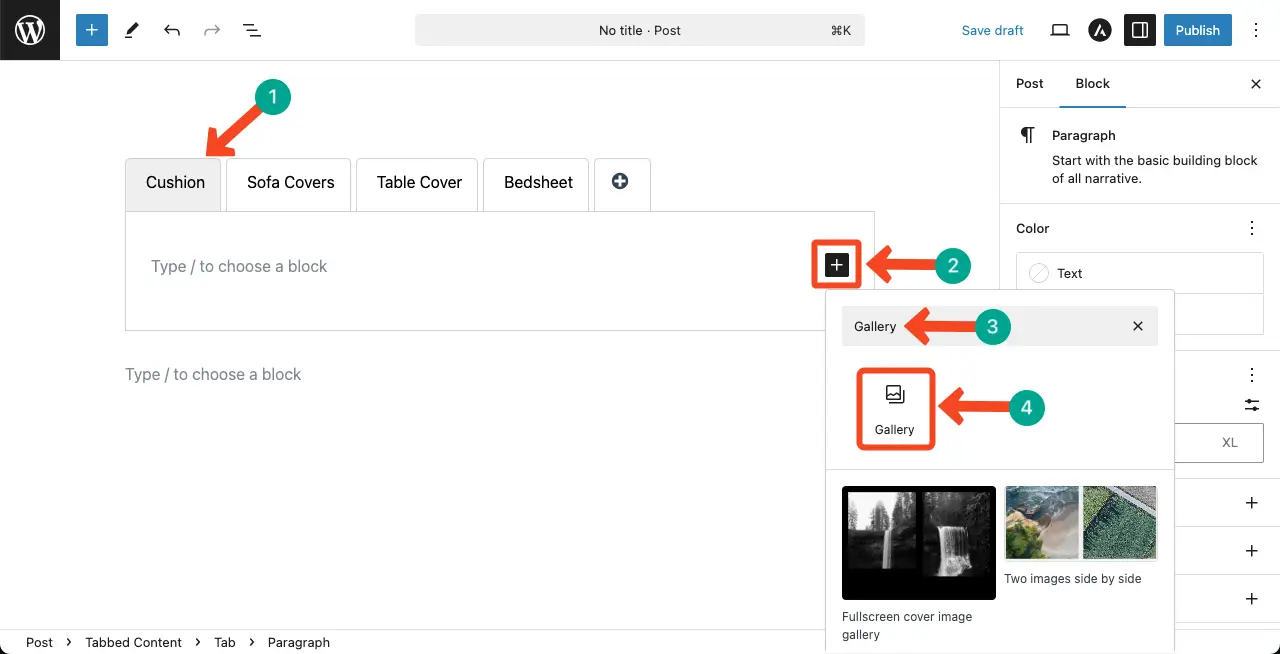
First, select a tab. You’ll see the Gutenberg plus (+) icon in each tab. Click it and write Gallery in the search box.
Once the Gallery block appears, add it to the tab.
Note: WordPress has a default Gallery block by which you can create a basic-level gallery on your website.
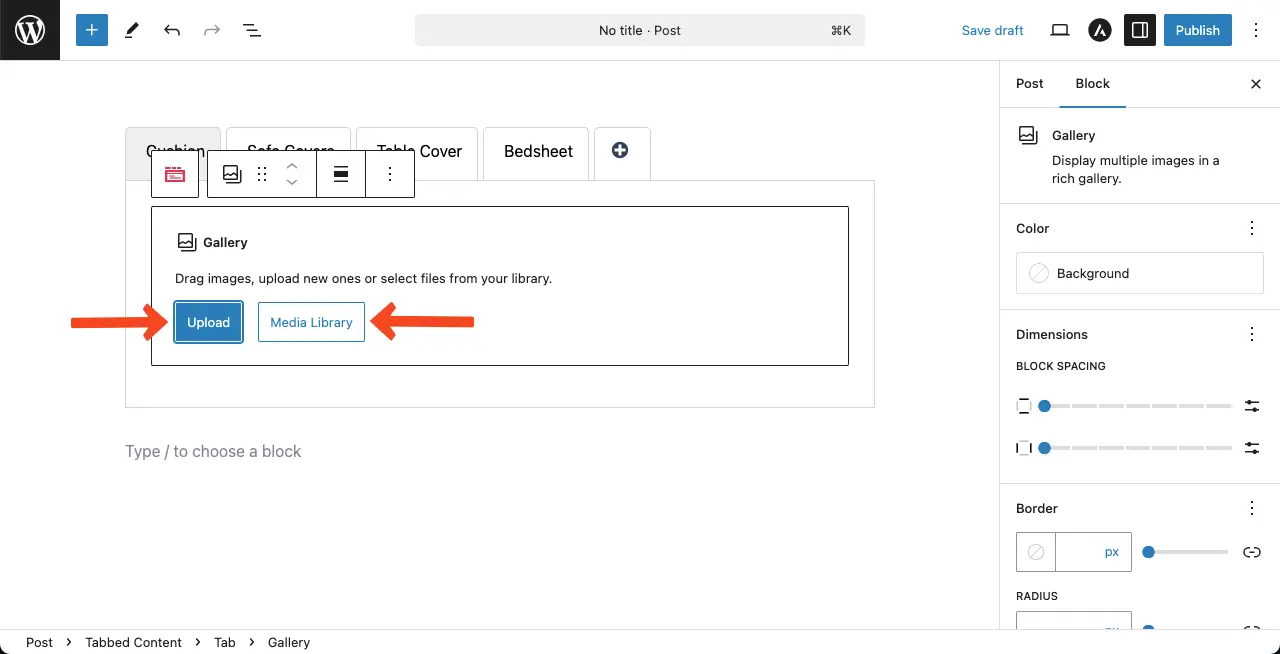
You’ll get options to upload images from the local drive or media library.
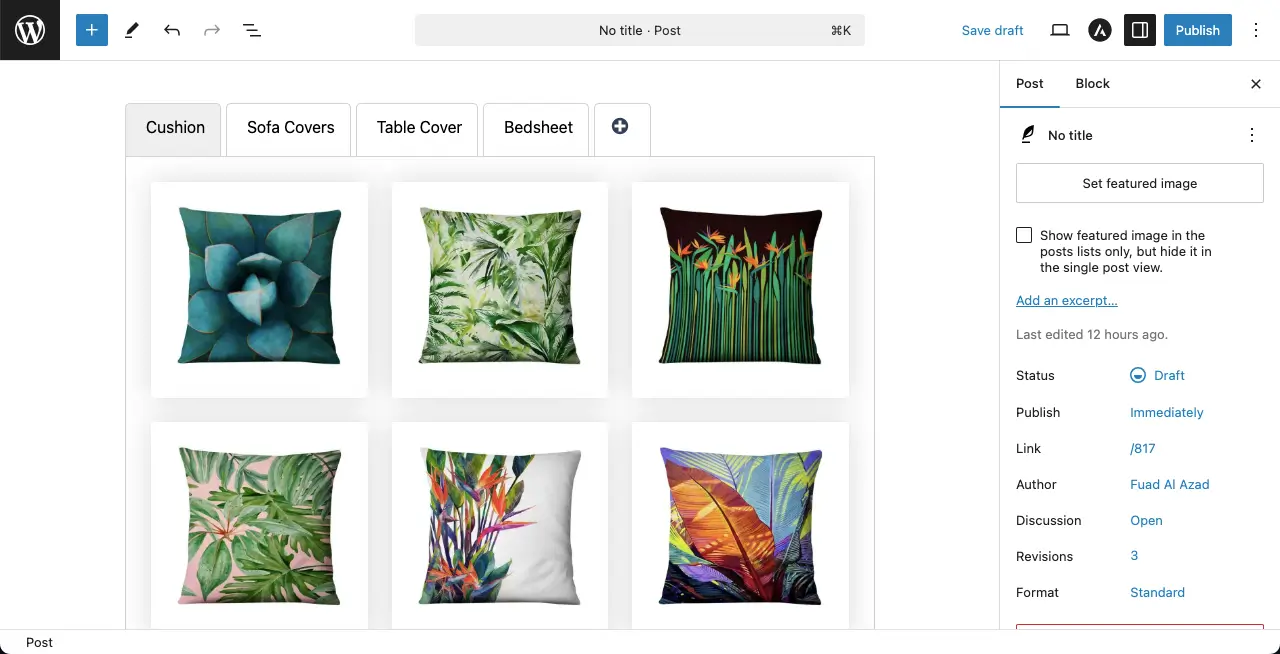
You can see the images are added to the gallery within the selected tab.
Check how to add text animation in WordPress.
Step 04: Add Alter Texts to the Gallery Images
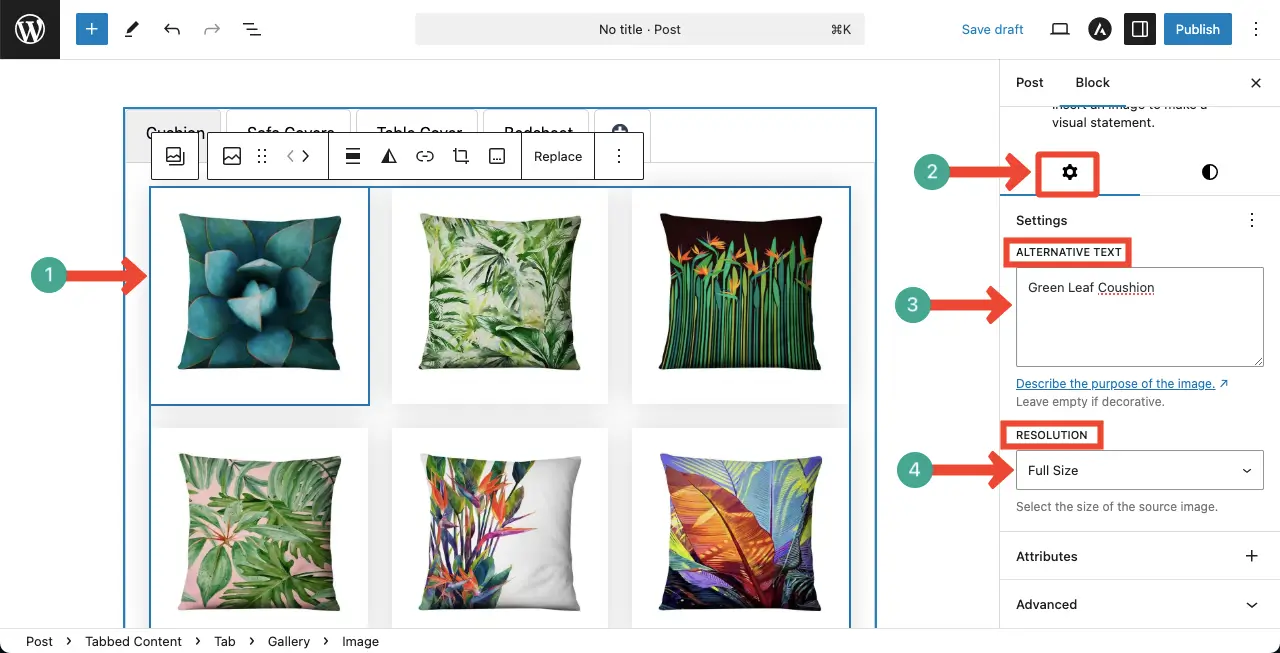
Select an image by clicking it. On the right sidebar, under the Settings tab, you’ll see the options to add Alternative Text and set Resolution.
# Stylize the Gallery Images
After that, go to the Styles tab, keeping the particular image selected.
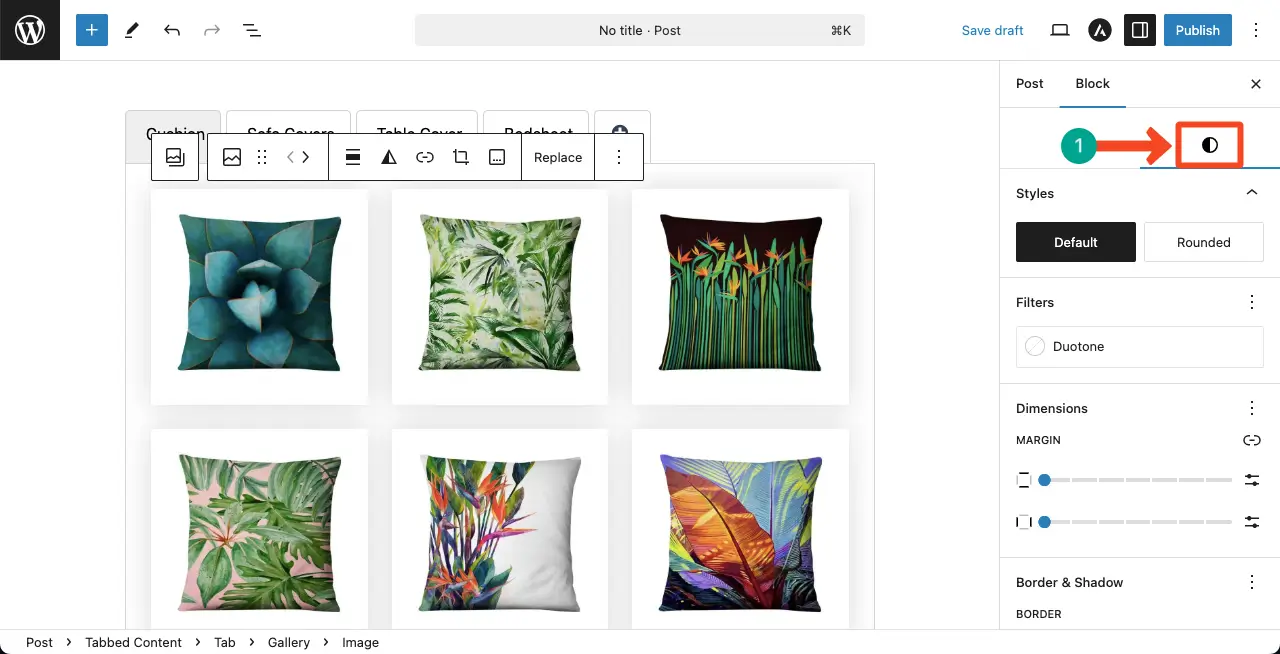
You’ll get options to add duotone, margin, border, and radius to the image.
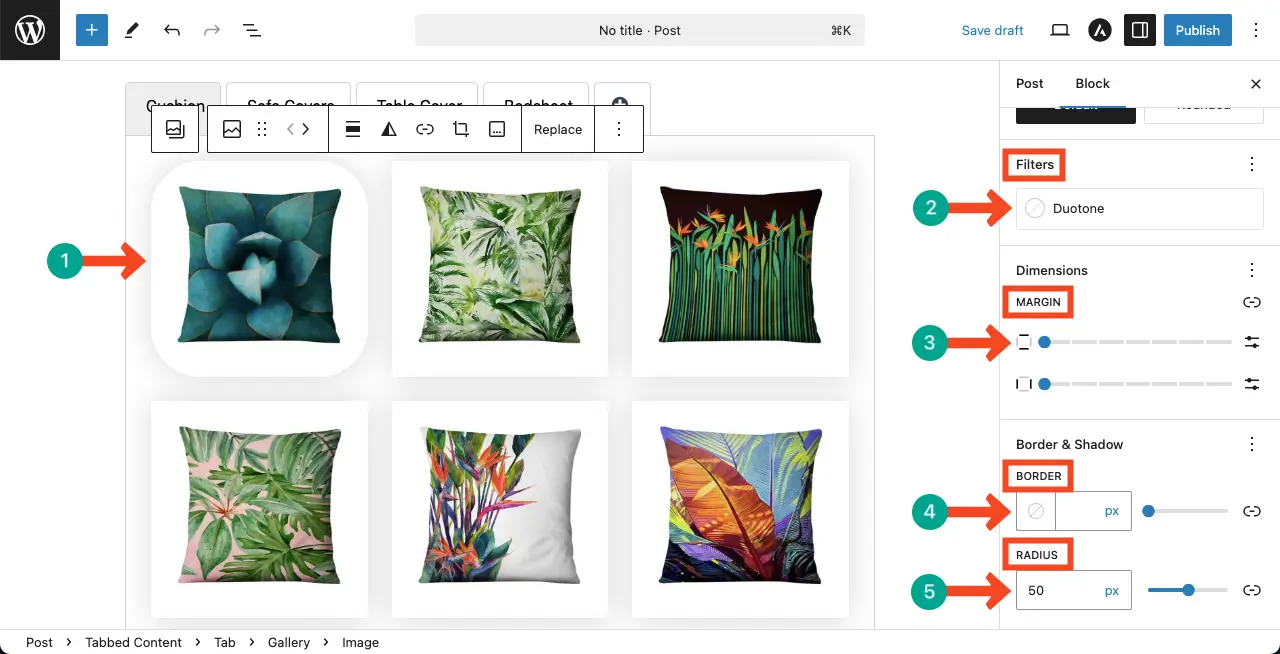
Step 05: Configure Settings for the Gallery Block
In addition to customizing images individually, you can also customize the settings and stylization of the entire gallery block if you want.
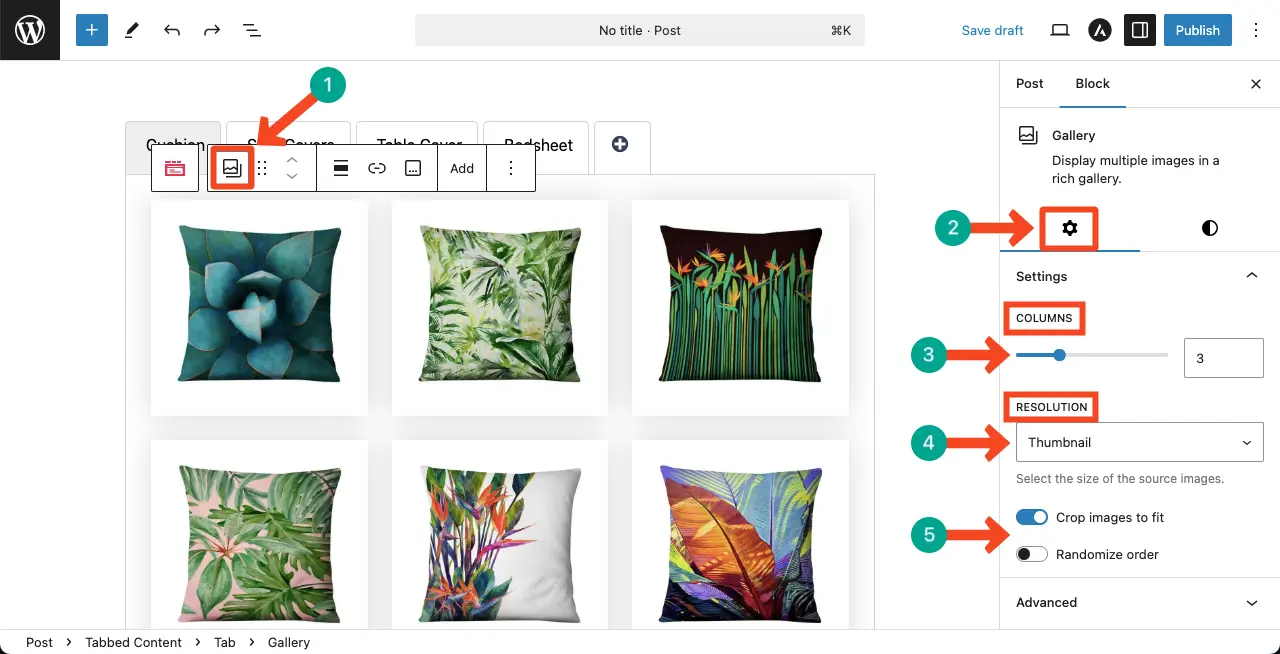
To do this, select the entire Gallery block by clicking the Gallery icon on the toolbar.
Then, come to the Settings tab on the right sidebar. You’ll get options to define the column number and resolution.
After that, you can enable the crop images to fit and randomize order options.
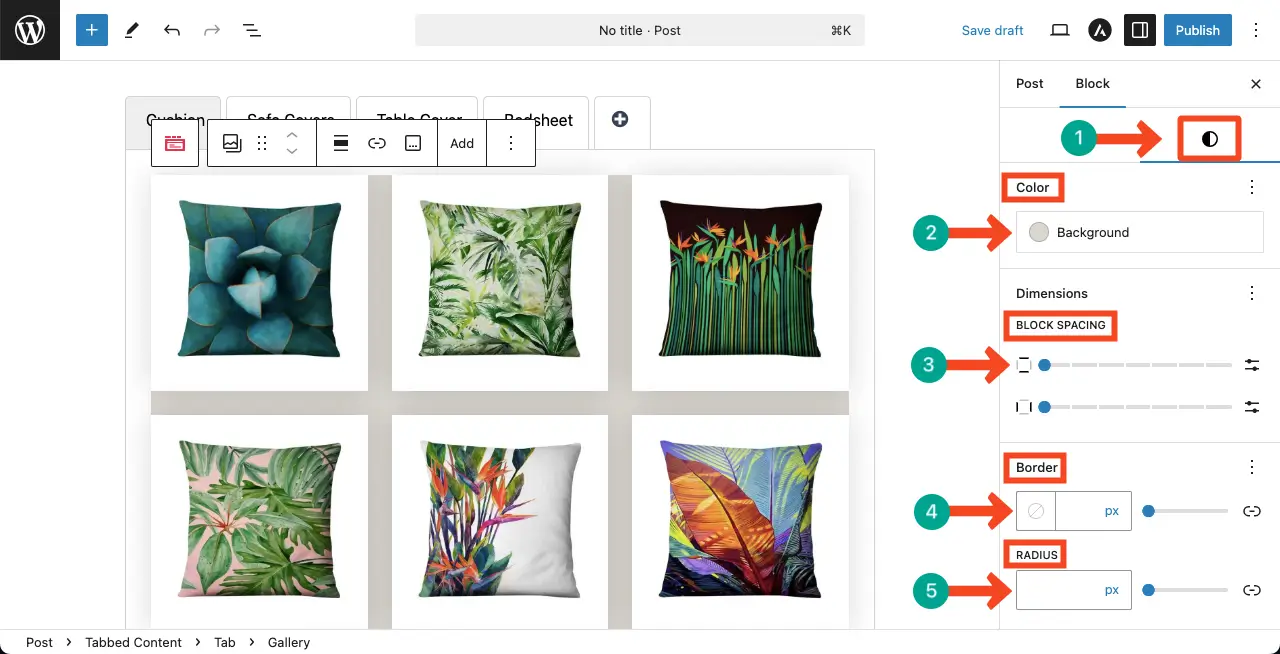
Now, go to the Styles tab. You can customize the background color for the gallery block.
After that, by customizing the block spacing, you can change the spacing between the images in the Gallery block.
Finally, personalize the border and radius of the block.
Thus, add the gallery block to other content tabs as well in the same way.
Here’s a guide on how to create image carousel in WordPress.
Step 06: Customize the Tabbed Content Block
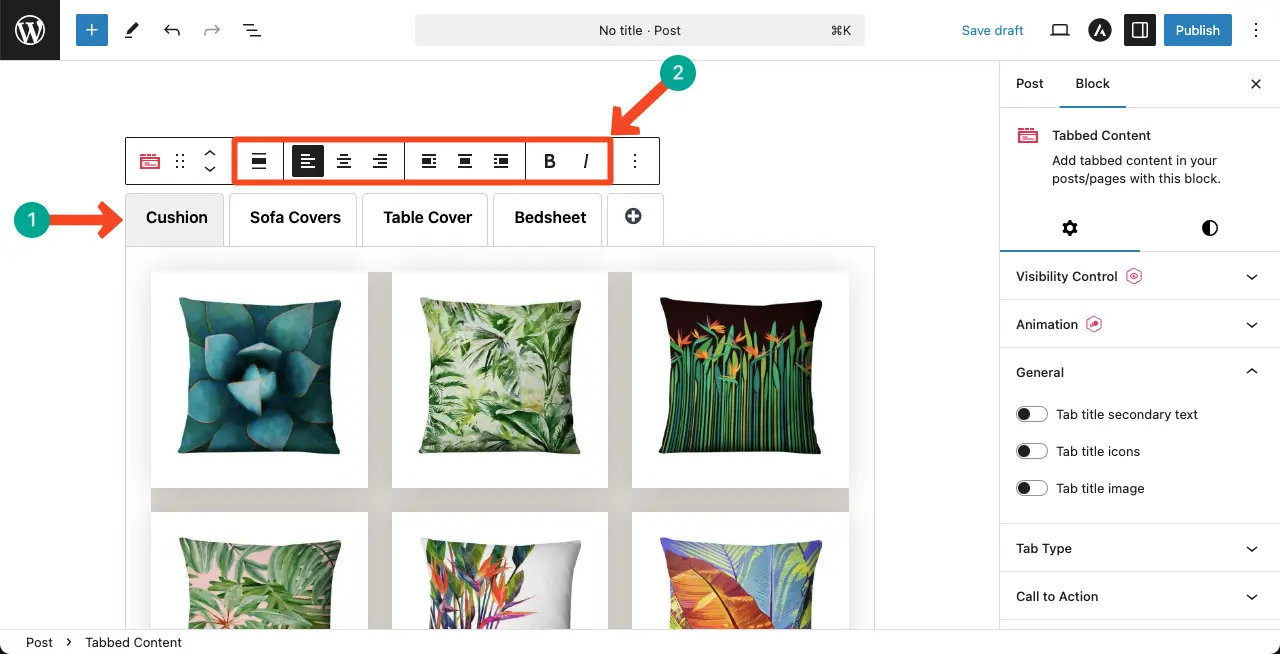
When the cursor is placed on the tabbed titles, the toolbar will appear. You can customize their boldness and alignment.
Do it as necessary.
# Configure Settings for the Tabbed Content
Go to the Settings tab while keeping the Tabbed Content block selected. Under this tab, you’ll get the following options and things to do with them.
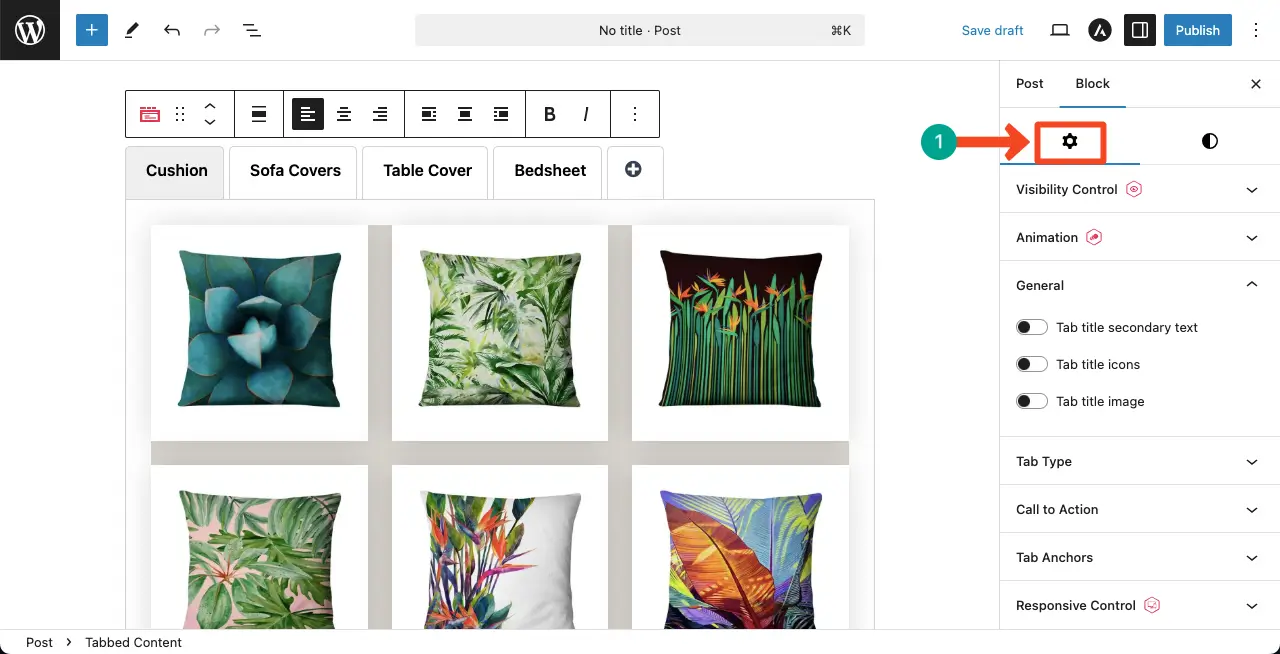
Visibility Control – It allows you to hide/display the block. You can even create a schedule for when the block will automatically appear and disappear in due time.
Animation – The block comes with 55+ animation effects. You can add any animation effect to the Tabbed Content block.
Responsive Control – It allows you to hide the block on any particular device type (mobile, tablet, desktop) you want.
General – It allows you to add secondary title text, title icons, and title images.
You can check how to add them next to the titles of each tab of the Tabbed Content block.
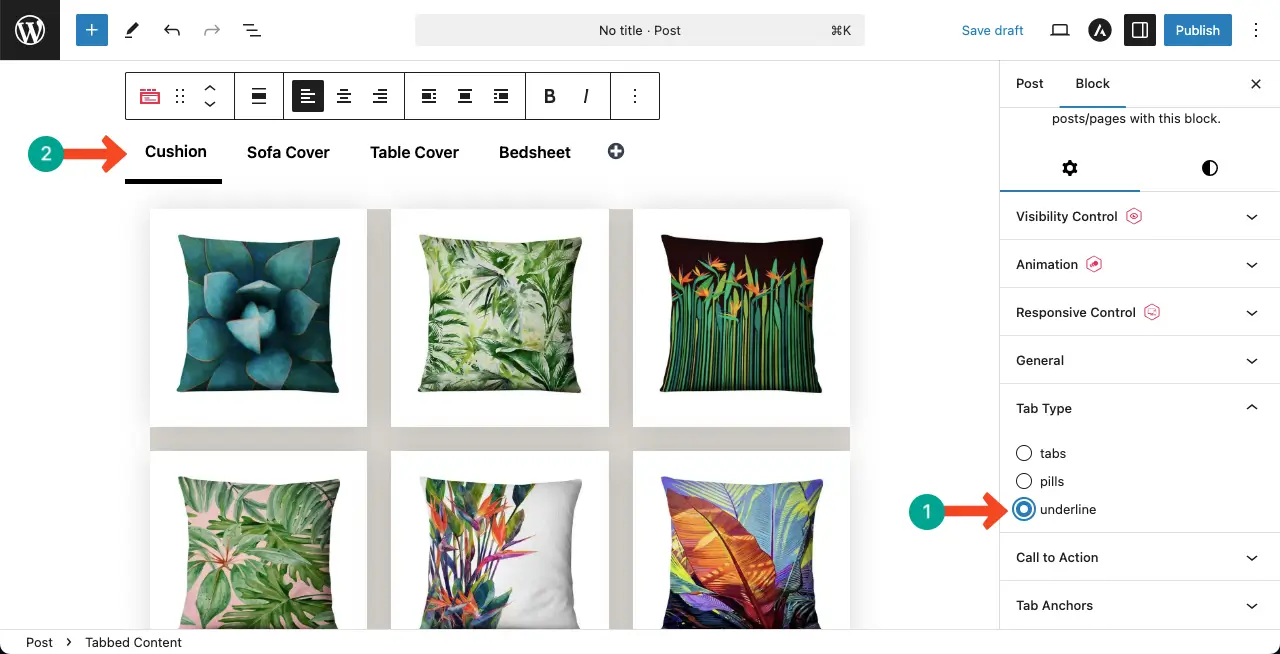
Tab Type – You can display the Tabbed Content block whether as a tab, pills, or underline. You can see how these options work in the sliders added below.


# Stylize the Tabbed Content Block
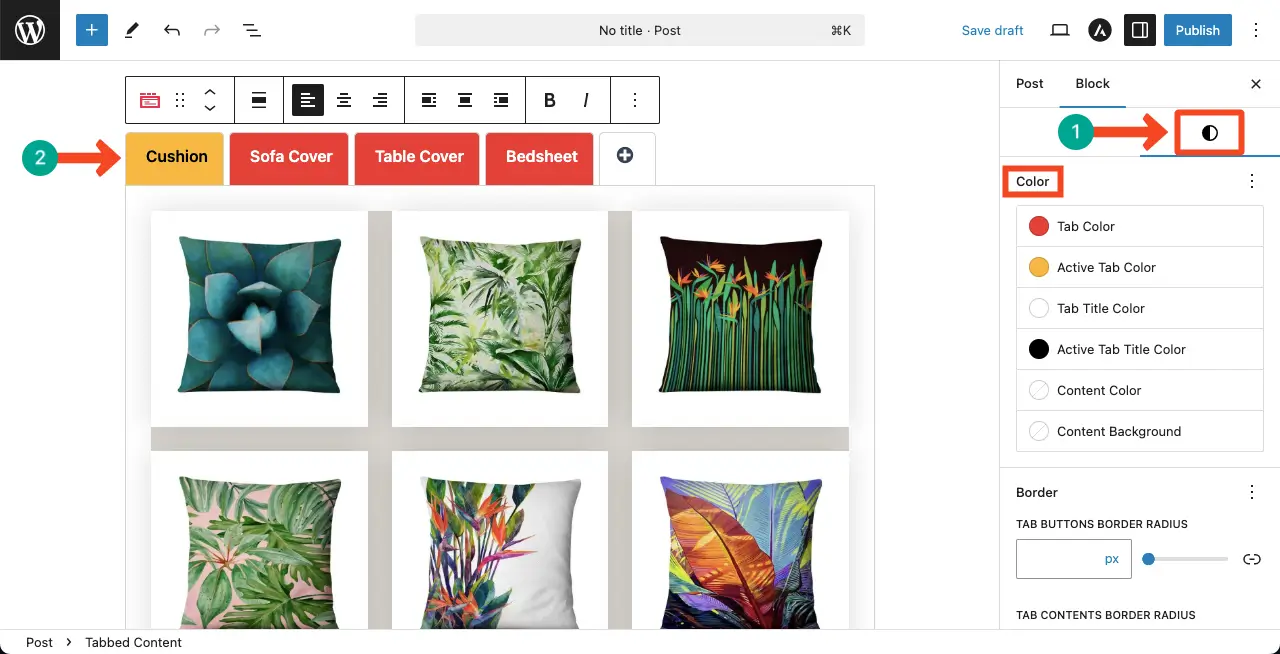
Come to the Styles tab, keeping the Tabbed Content block selected.
From the Color section, you can define the tab color, active tab color, tab title color, active tab color, and more.
Explore this tutorial on how to add advanced heading in WordPress.
Step 07: Preview the Filterable Gallery
So, your tabbed gallery is ready. Go to the preview page to check if everything is fine.
Thus, you can easily create filterable galleries using the Gutenberg block editor in WordPress.
Conclusion and Best Practices
Creating a filterable gallery in WordPress is a fantastic way to enhance your website’s visual organization and user experience. As you implement the steps outlined in this post, keep in mind some best practices to ensure your gallery is not only functional but also visually appealing.
- Optimize Image Size: Always use optimized images to ensure quick loading times. This is particularly important for eCommerce sites where speed can impact conversions.
- Consistent Categorization: When setting up your filters, maintain a consistent naming convention for categories and tags. This helps users easily navigate and find their desired content.
- Responsive Design: Ensure that your filterable gallery is responsive and looks great on all devices, as many users may access your site from mobile devices.
- User-Friendly Interface: Keep the filter options clear and straightforward. Avoid overwhelming visitors with too many filters; instead, prioritize the most relevant categories that align with your content.
- Test Functionality: After setting up your gallery, conduct thorough testing to ensure that all filters work correctly and lead to the expected results.
By following these best practices, you’ll create a filterable gallery that not only showcases your content effectively but also enhances the overall user experience on your WordPress site. Happy building, and may your gallery become a valuable asset in engaging your audience!

