The Content Filter is a dynamic WordPress block that allows you to create and display filterable content sections on posts and pages. This makes it easy to present information in a user-friendly manner.
The default Gutenberg block editor doesn’t have any system to add the content filter option. So, you need to depend on an additional plugin. In this article, I will explain how to add WordPress content filter in Gutenberg using such a plugin.
Let’s dive into the tutorial right away!
How to Add WordPress Content Filter in Gutenberg
As said before, you need an additional plugin. You can consider the Ultimate Blocks plugin. It comes with around two dozen extremely useful custom blocks to power your Gutenberg block editor.
Among them, Content Filter is a block by which create such filterable sections in WordPress. Install and activate the Ultimate Blocks plugin on your site.
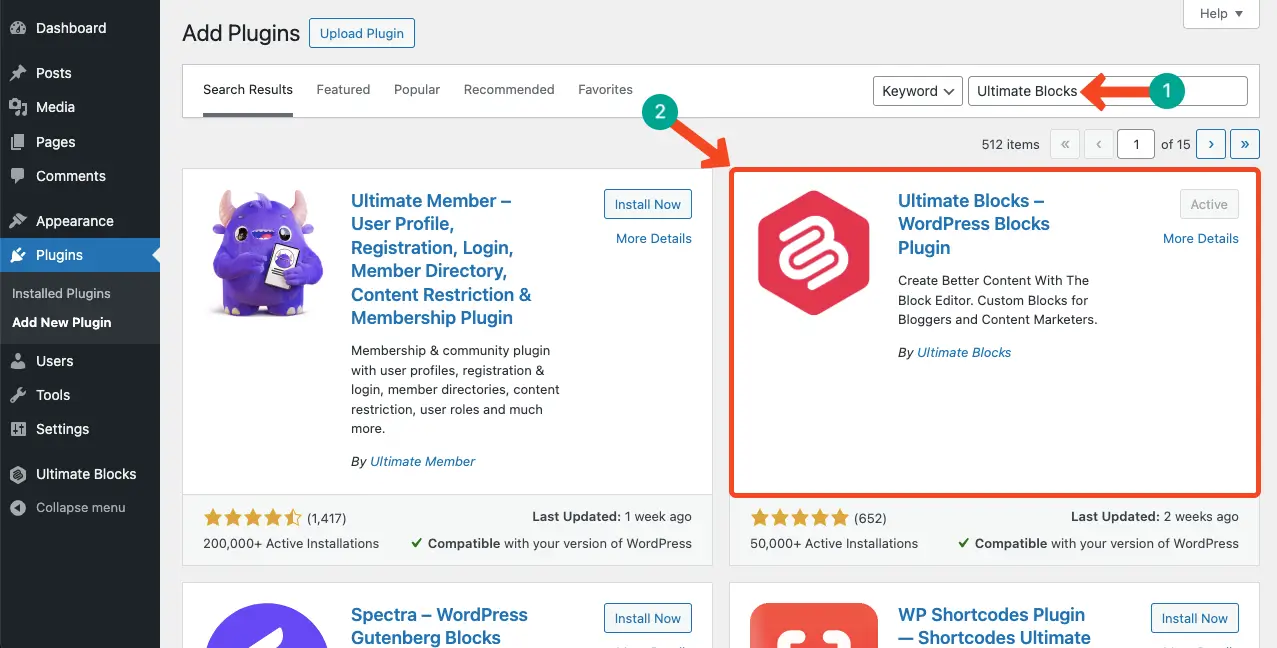
Once the plugin is installed and activated, start following the tutorial explained below.
Step 01: Add the Content Filter Block to the Editor
Like any other block, add the Content Filter block to the Gutenberg block editor.
Click the plus (+) button on the editor. Type Content Filter in the search box. Once the block appears, add it to the editor.
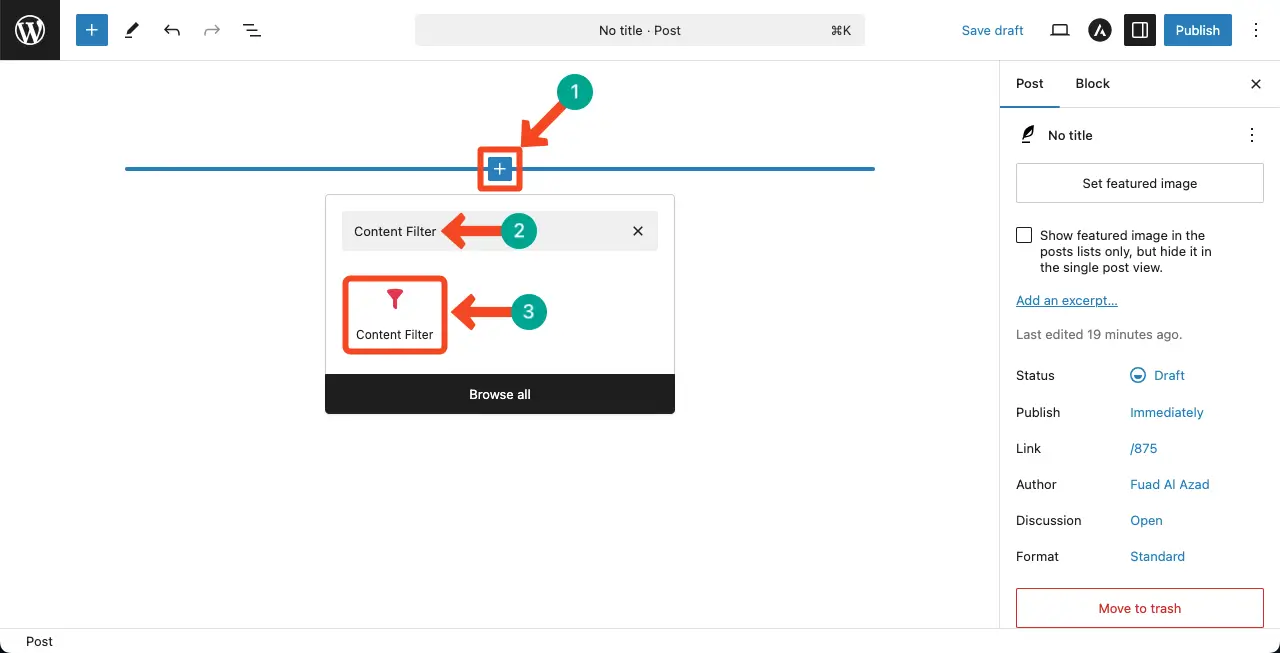
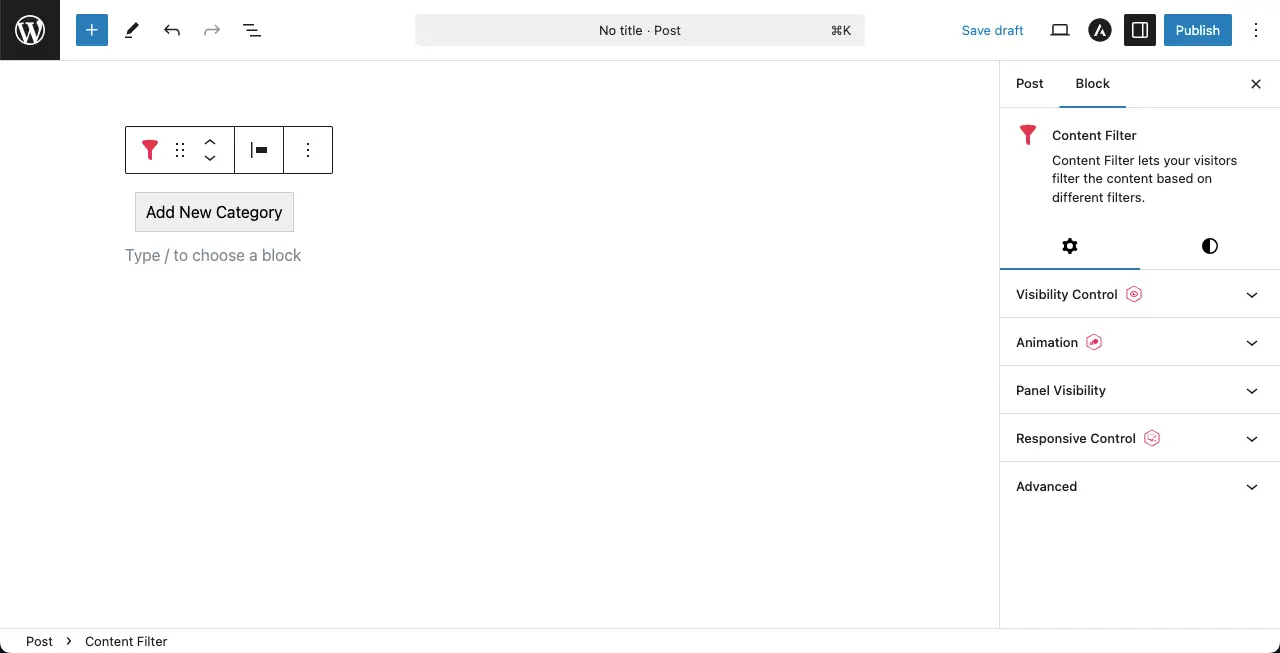
The content filter block will be added to the editor in a few seconds.
Learn how to create a filterable gallery in WordPress.
Step 02: Create Content Categories and Tabs
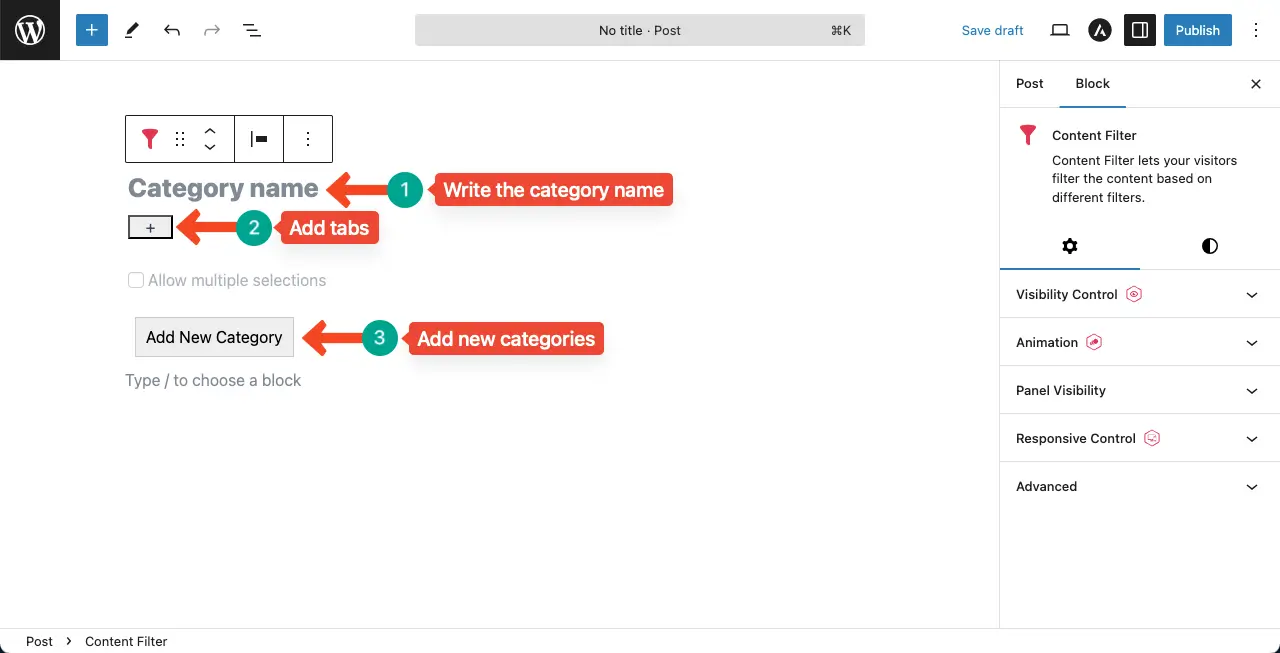
Click the Add New Category button.
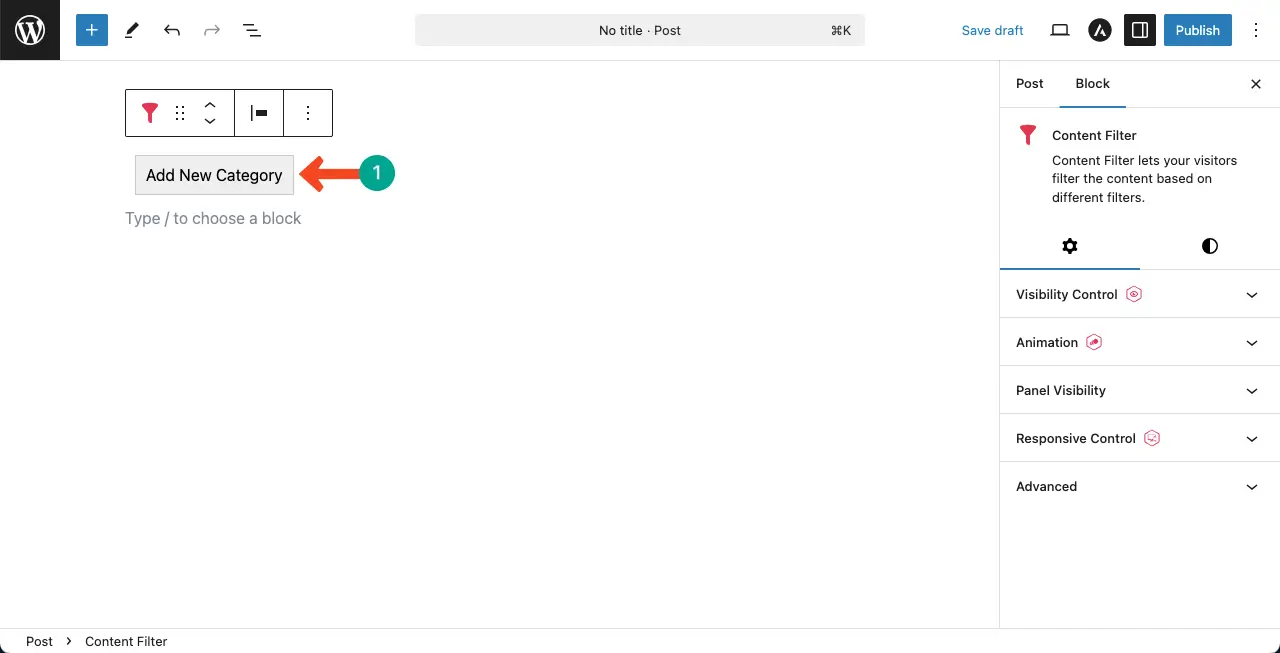
Write a name for the category. To add tabs under the category, click the plus (+) button.
To add new categories, click the Add New Category button as shown above. You can create as many categories as you want.
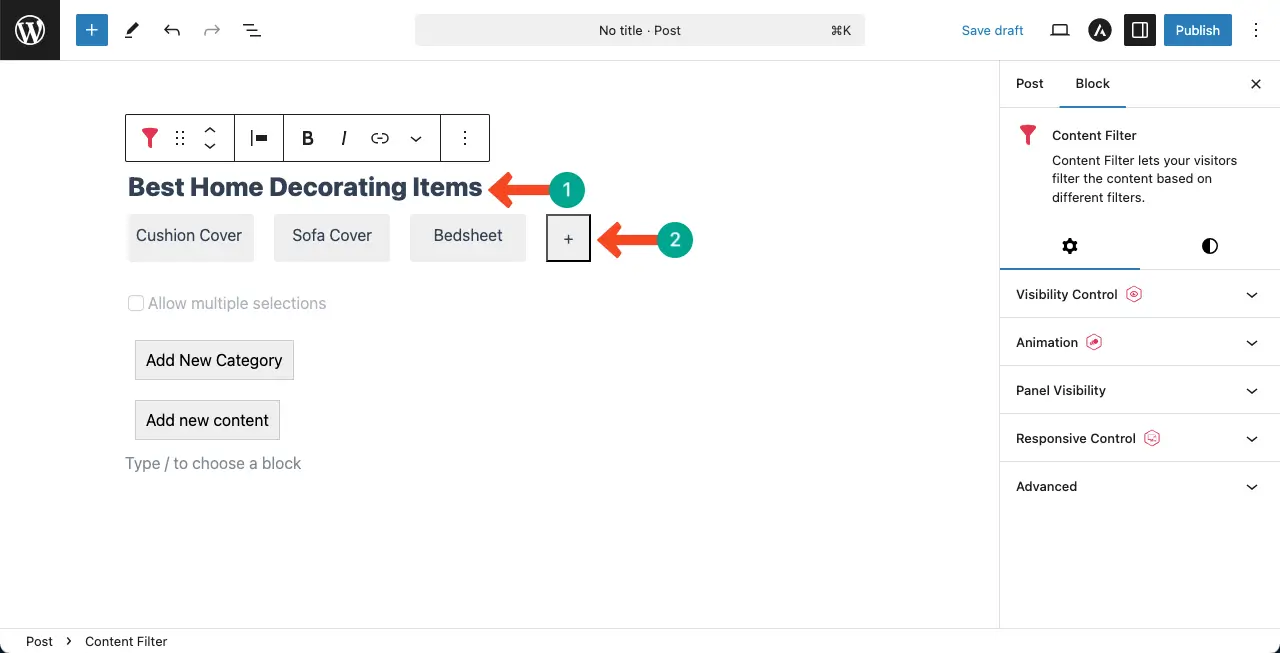
You can see that I have added a name for the category, created several tabs, and named them.
Check how to add coupon code to WordPress websites.
Step 03: Add Content to the Block
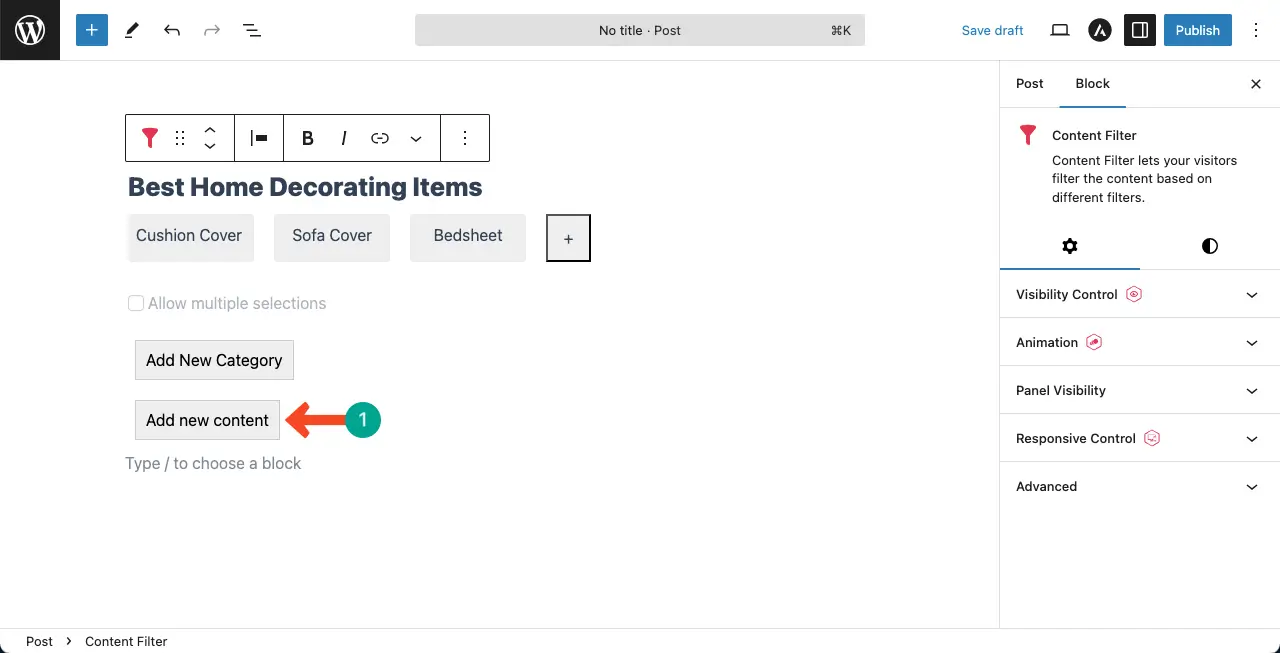
As your category and tabs are ready, click the Add new content button to add the content you want to display on your post/page.
You’ll see a space for adding content is created. This space works the same way as the Gutenberg block editor.
By clicking the plus (+) button, add any type of content you want.
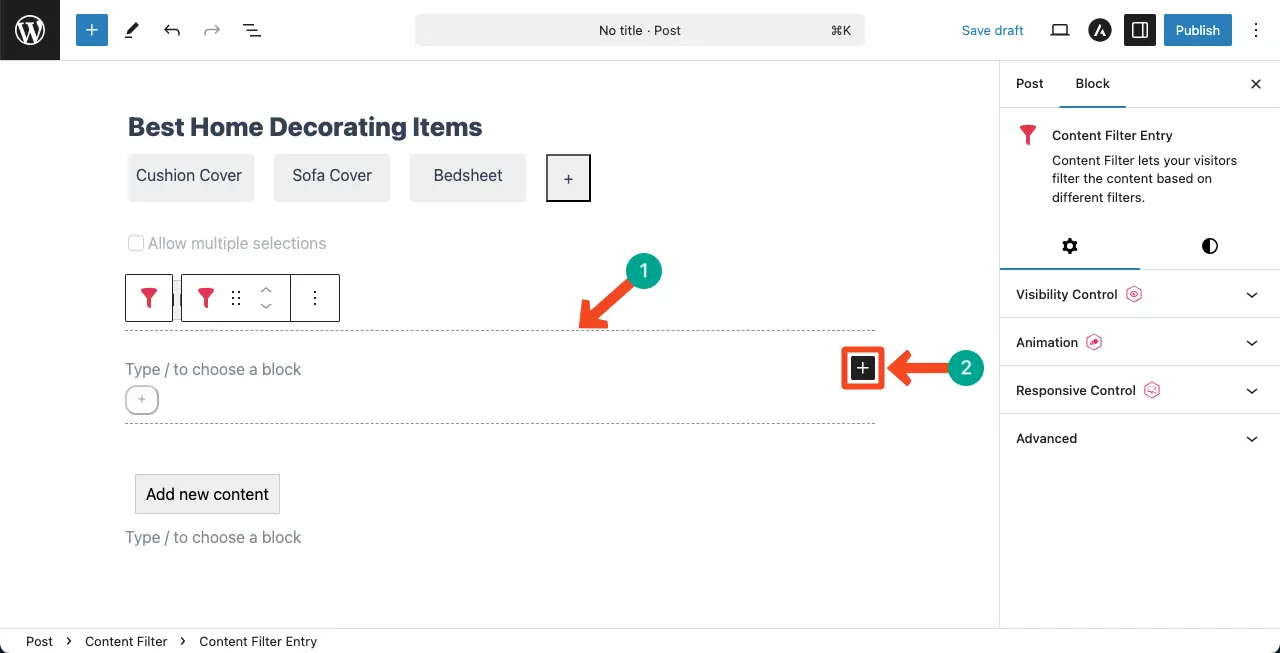
Add any blocks you want to the Content Filter block.
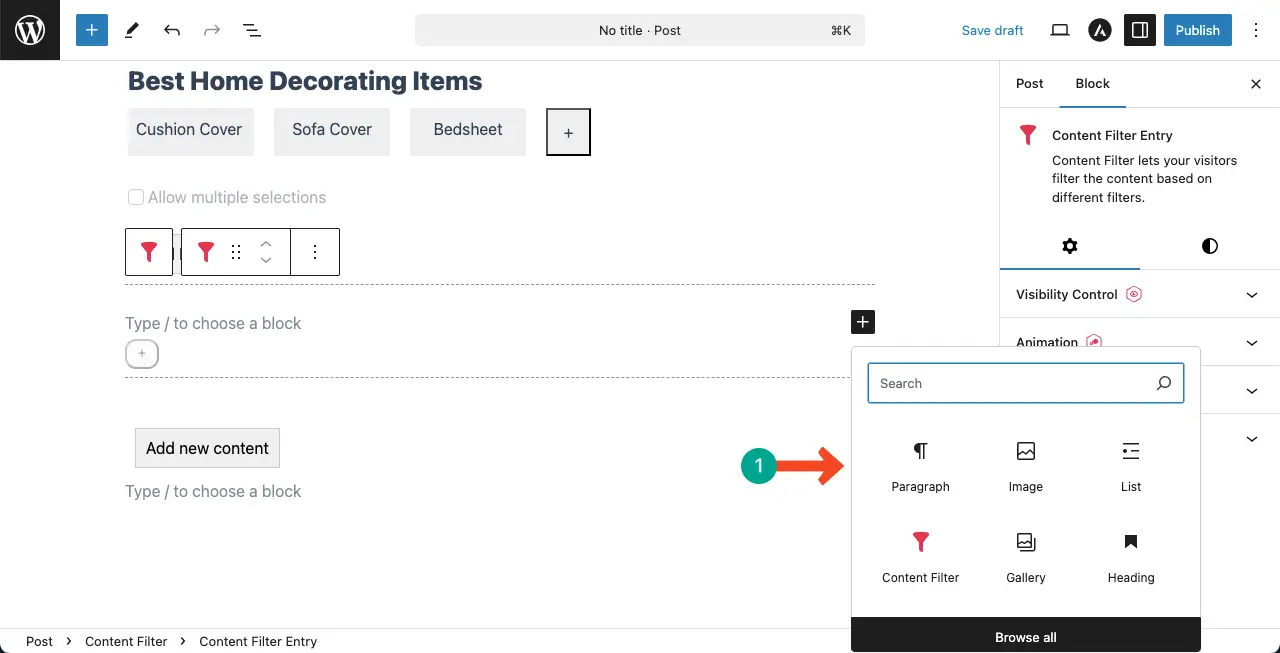
For this tutorial, I have added the Paragraph and Gallery blocks. Then, add the necessary content to the block.
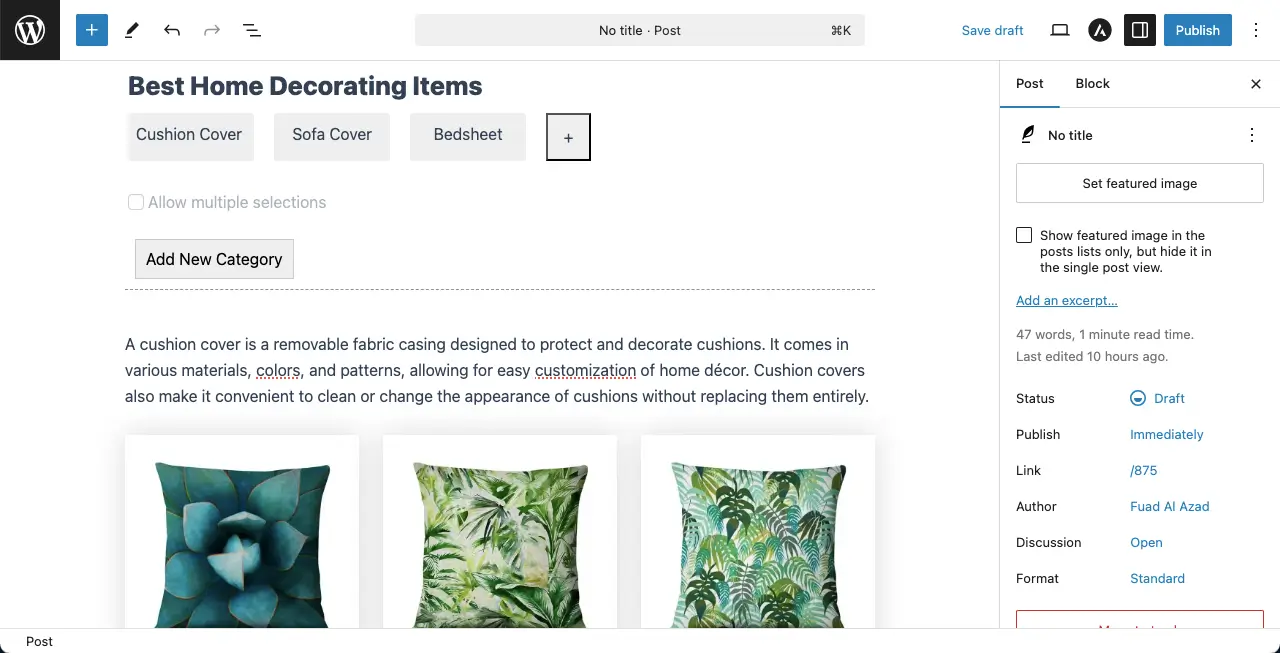
Come to the end of the content. You’ll see a plus (+) button.
Clicking the button will open up a list, including the tabs you created a while ago. Select the tab for which you want to specify this content. You may even select multiple tabs if necessary.
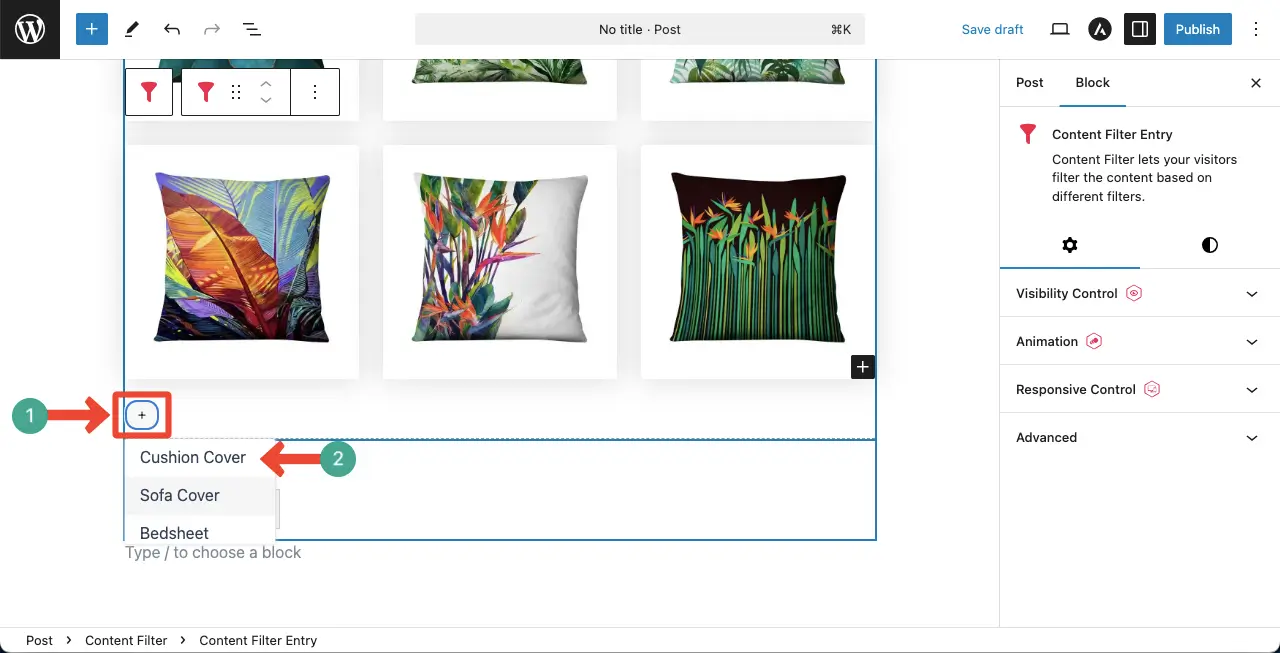
I have selected the Cushion Cover tab for the content as you can see in the image below.
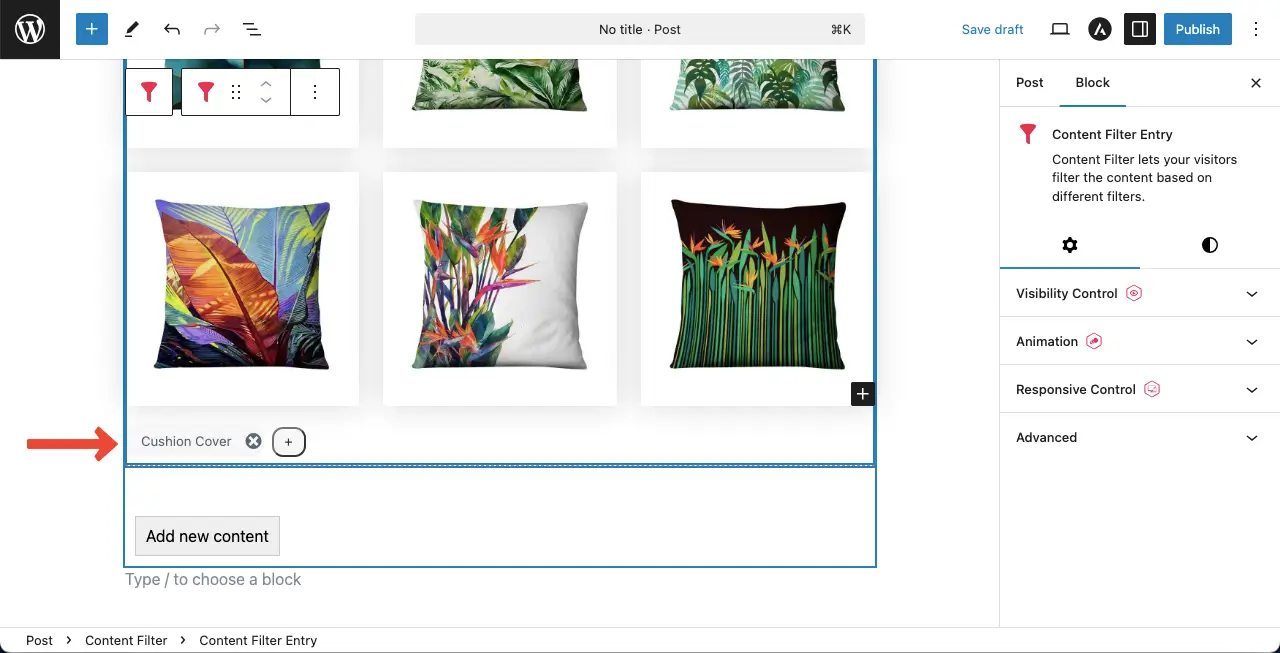
In the same way, add content for more blocks. I have done it as you can see in the clip below.
Here’s a guide on how to create a call to action block in WordPress.
Step 04: Save and Preview the Content
Come to the preview page. You’ll see the entire content section appears as tabbed content. Now, switching between the tabs, see if all the content is working well.
It’s working nicely on my end. Check the video clip attached below.
Learn how to create an image carousel in WordPress.
Closing Up!
Adding a content filter in WordPress Gutenberg can significantly enhance user experience by making it easier for visitors to find relevant content quickly. By leveraging tools like custom taxonomies, query blocks, or third-party plugins, you can implement a filtering system tailored to your site’s needs.
To ensure optimal results, keep the filter options simple and intuitive, testing the functionality across devices, and using clear labels for filter categories. Additionally, avoid overloading your site with unnecessary filters, as this can overwhelm users and slow down performance.
With a well-designed content filter, you can improve your website’s navigation and keep your audience engaged for longer.


