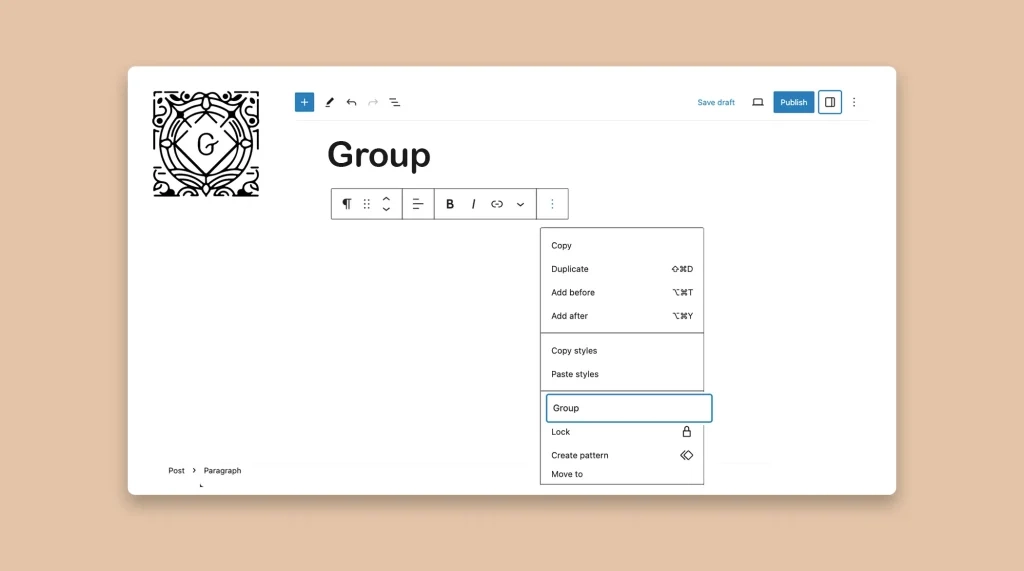
When your website starts growing, managing and structuring content becomes increasingly difficult. Although WordPress offers a versatile block editor that allows you to create engaging layouts, sometimes it becomes challenging to maintain a consistent structure when dealing with multiple blocks.
To overcome this problem, WordPress offers a Group block by which you can group multiple blocks together and create a flexible content layout and structure. In this blog post, I will show you multiple ways how to group blocks in WordPress.
What Is the Gutenberg Group Block in WordPress?
The Gutenberg Group block is a default WordPress block that allows you to group multiple blocks together inside a container block. It acts as a parent block, holding various child blocks within it, and provides a way to organize and manage complex layouts more effectively.
By grouping blocks, you can easily move, style, and manipulate them as a single unit, enhancing the flexibility of the overall content structure. The Group Block is available in the Gutenberg block library.
How to Group Blocks in WordPress
There are two ways you can group blocks in WordPress. You can do it whether using the Group feature on the Gutenberg toolbar or directly using the Group block. Let’s explore both these methods.
Method One: How to Group Ready Blocks in WordPress
The first method will show you how to group blocks in WordPress using the Group feature in the Gutenberg toolbar.
Step 01: Select All the Blocks and Select the Group Option on the Toolbar
Select all the blocks using your cursor. You’ll see the Group option appearing on the Gutenberg toolbar.
Hit the Group option on the Gutenberg toolbar.
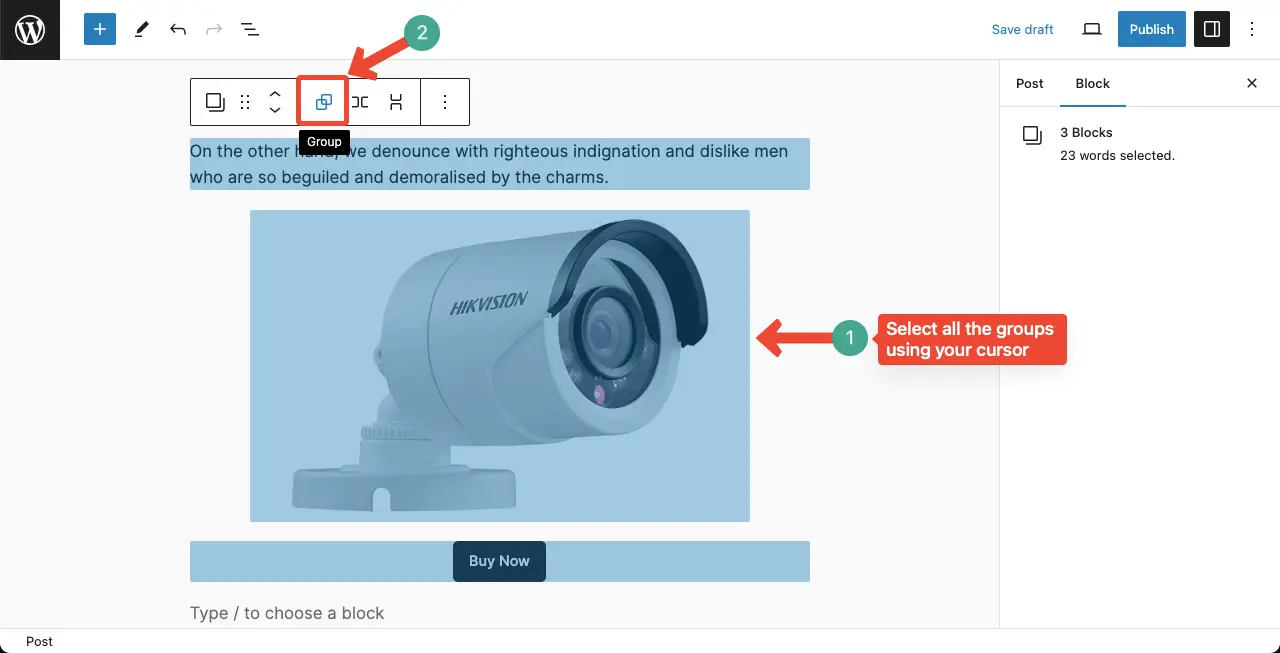
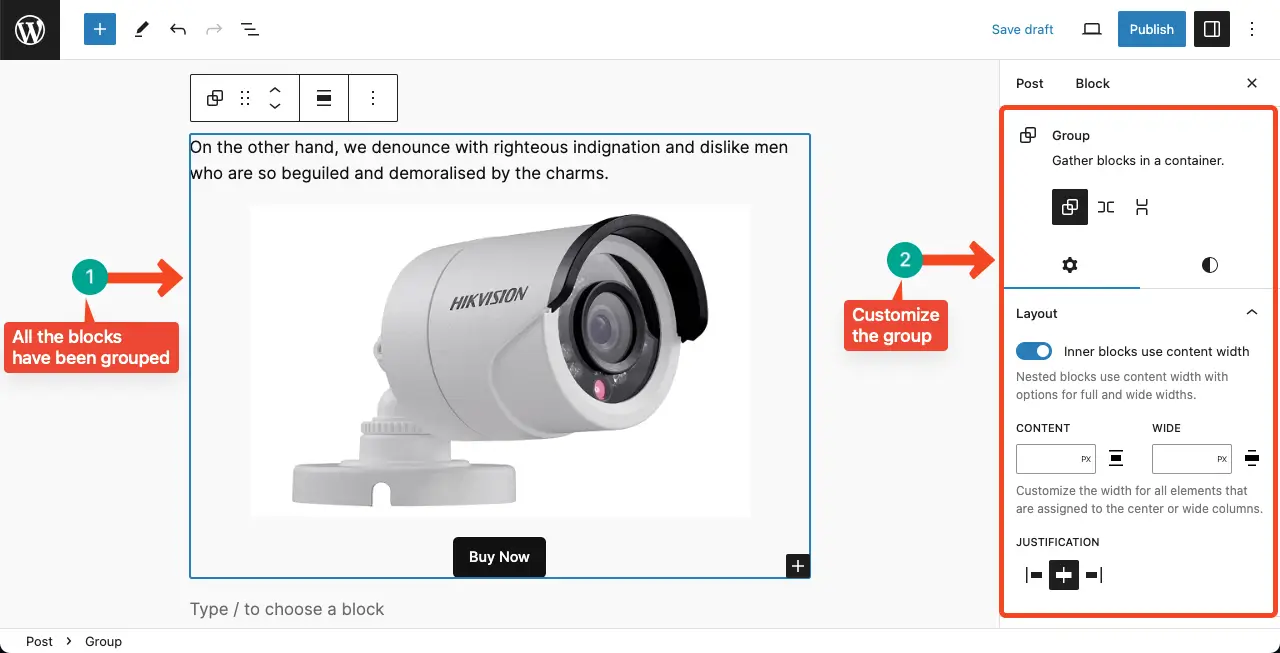
Step 02: Configure Settings of the Group Feature
You’ll see all the selected blocks have been grouped into one unit in a few seconds. Next, you can customize the group using suitable options on the right sidebar.
To add more blocks to the group, use the plus (+) icon in the bottom-right corner.
Method Two: How to Start Grouping Blocks in WordPress from Scratch
This option will be suitable if you don’t have any readymade blocks on your posts and pages.
Step 01: Find and Add the Default Group Block to Your Editor
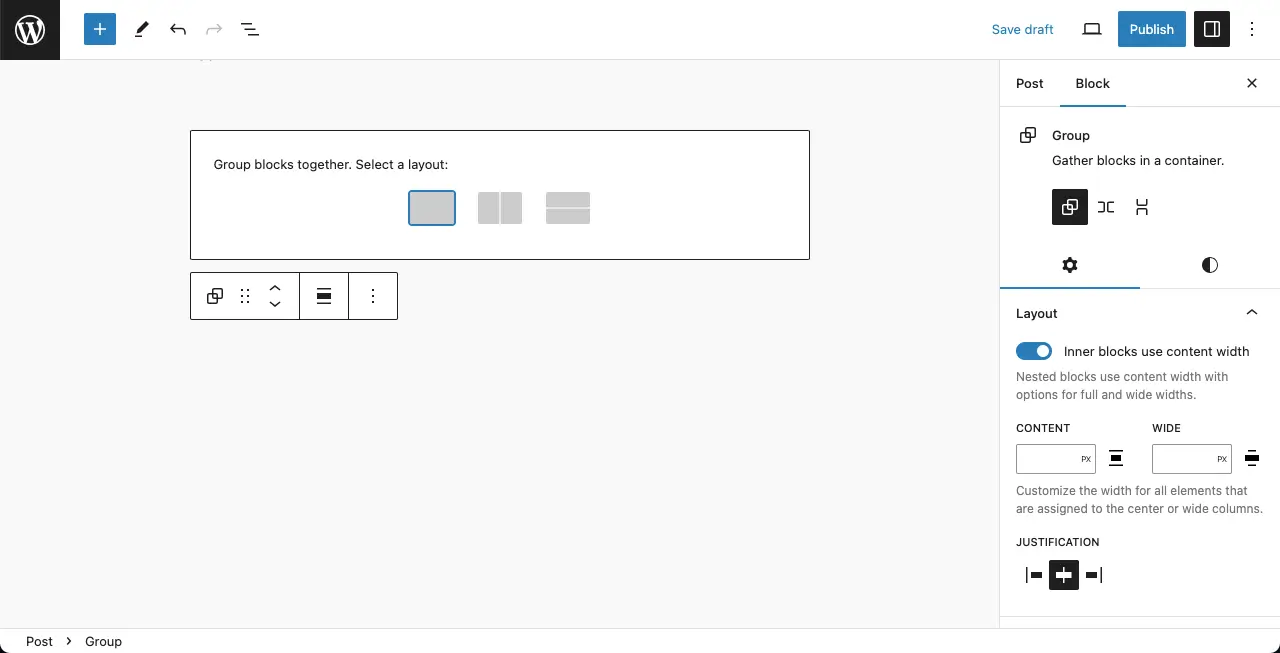
Press the plus (+) icon. Type Group in the search bar. Hit the block once you see it.
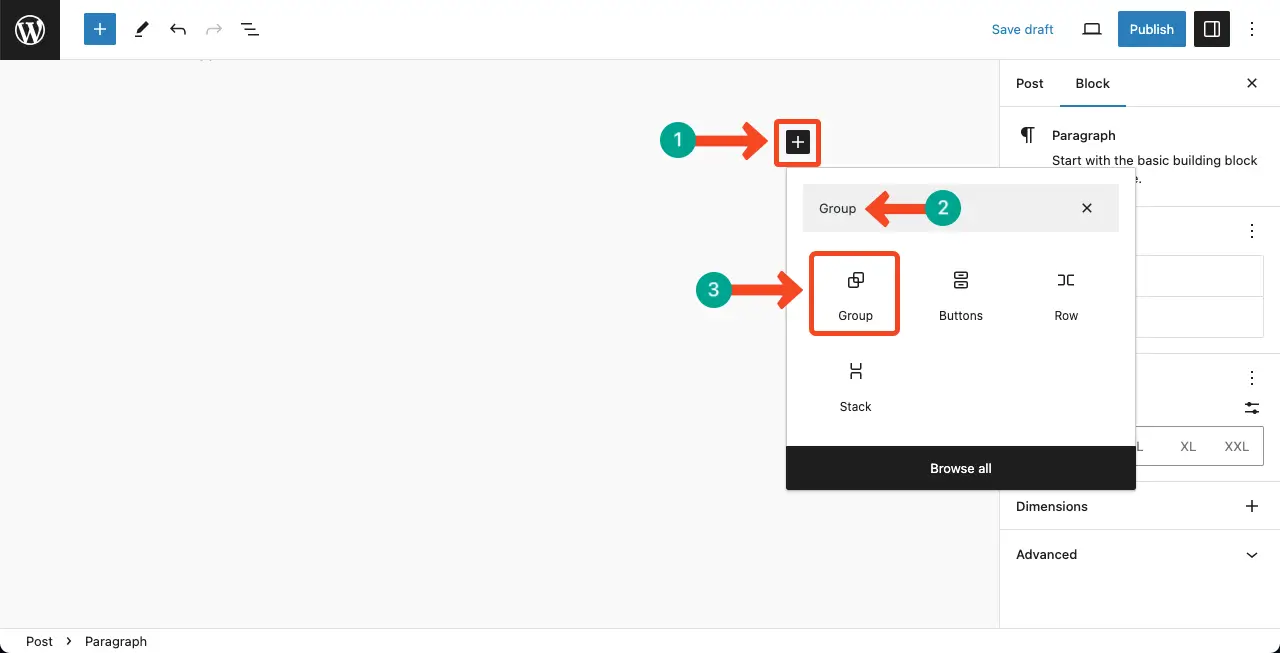
Select a layout. For this tutorial, we have selected the first section. This will create a group container.
Step 02: Start Adding Content to the Group
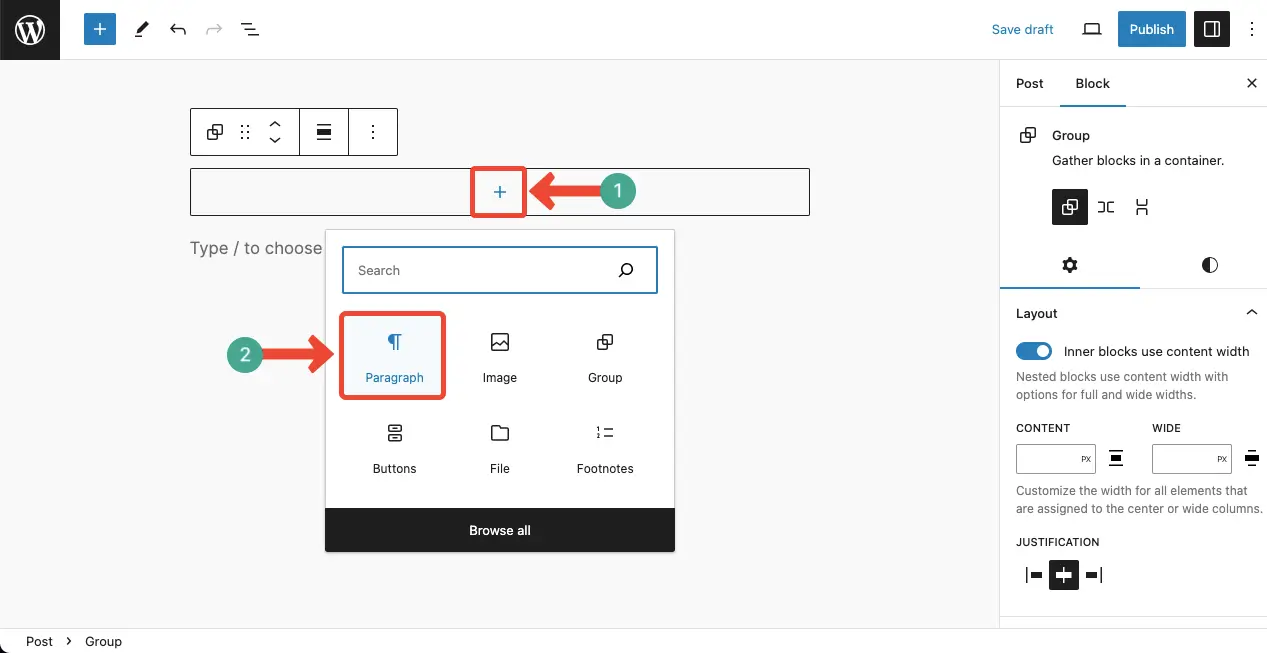
Once the group container is ready, it’s time to add content within it.
Press the plus (+) icon in the middle part of the container. You’ll be allowed to add blocks to add respective content types within it. We have selected the paragraph as our first block.
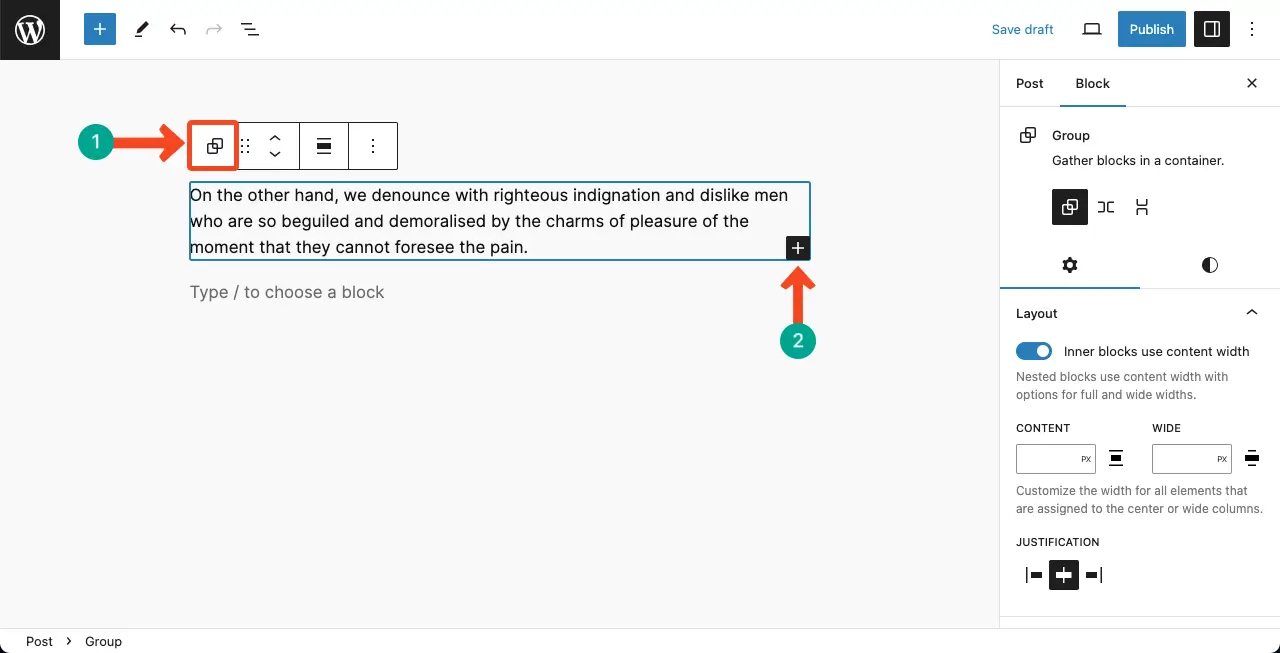
After placing the paragraph, hit the Group icon again on the toolbar. This will bring up the plus (+) icon again on the bottom-right corner of the container. Using this, you can add another block. Do it yourself.
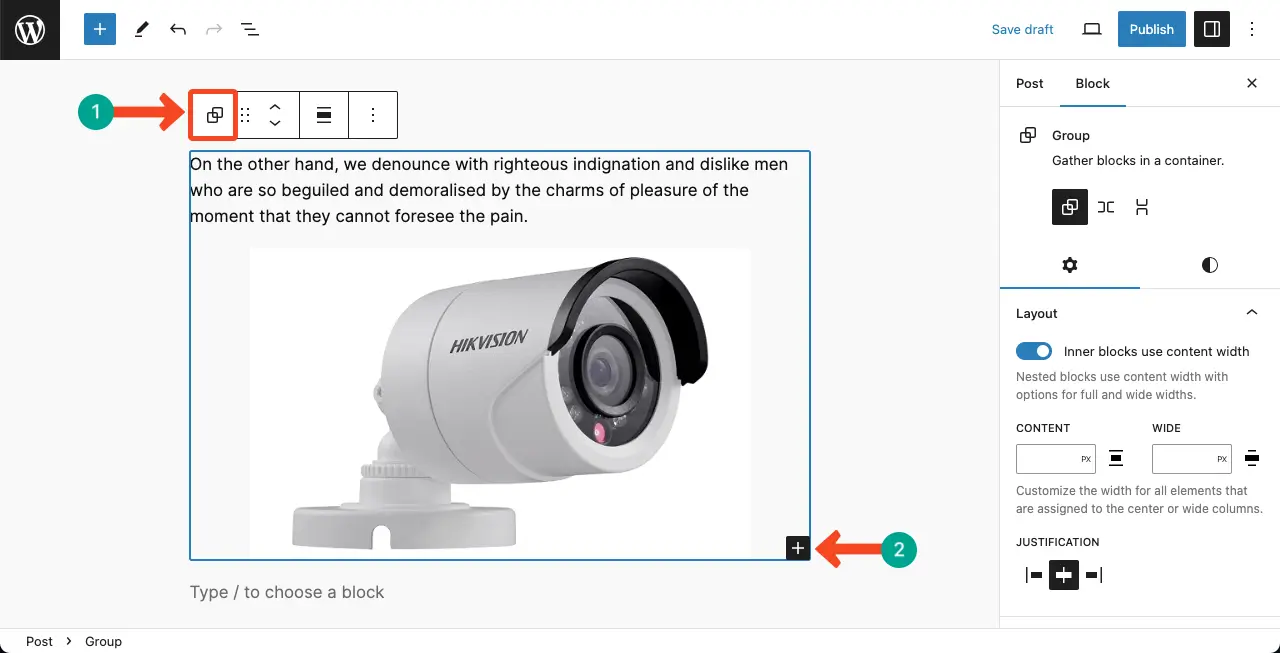
You can see that we have added an image to the block. In the same way, you can add more content to the group.
Step 03: Preview the Group
You can see all the blocks are grouped under one unit. Now, you can customize it using the same method shown above.

Learn how to lock and unlock a block in WordPress.
Best Practices to Consider When Grouping Blocks Together
As all WordPress blocks are unique with their own set of features, there are several points you must consider while using them to harness the best of them. I have covered some crucial best practices you must care about when thinking of using the Group block in WordPress.
1. Have a Purpose for Grouping
You cannot randomly group some blocks in WordPress. Whatever and whenever you group something, there must be a purpose behind that. Otherwise, your grouping won’t be meaningful.
2. Group Blocks that Can be Reused
You can save the Group blocks for reuse throughout your site. Reusable blocks can be helpful for creating custom templates or maintaining consistency across your content
3. Logical Grouping
Be logical when grouping blocks. Try to group blocks that are logically next to each other, considering their flow and organization.
4. Block Alignment and Spacing
Use the alignment and spacing options within the Group block to control the positioning and spacing of the grouped blocks.
5. Mobile Responsiveness
Test the responsiveness of your grouped blocks on different device sizes to ensure that the content is displayed properly and maintains a good user experience across all devices.
Conclusion
By grouping blocks, you can achieve better organization and maintain a logical flow within your content. This is especially beneficial when dealing with complex layouts or lengthy articles that require a structured presentation.
Follow our blog archive page to explore more content on WordPress.

