If you’ve ever visited a website and been captivated by a sliding display of images or content, chances are that it was a carousel gallery. It’s an interactive gallery feature that allows you to display multiple images in a rotating format with smooth transitions and navigational controls.
Whether you’re running a portfolio, an online store, or a blog, a carousel gallery can help you highlight your best work, promoting key content on the website. In this article, I will give you an easy guide on how to create a carousel gallery using the WordPress Gutenberg editor.
Image Slider vs Carousel: Key Differences Between Them
There are some people who are confused between the concepts of image slider and carousel. But both of them have some distinguishable key differences. So, before jumping to the tutorial part, we’ll explain the key differences between image slider and carousel. Explore them in the table below.
| Aspect | Image Slider | Image Carousel |
| Definition | Displays one image at a time, transitioning to the next in sequence | Displays multiple images in a row, allowing partial or full view of several images simultaneously |
| Focus | Focuses on one image at a time | Focuses on showcasing multiple images at once |
| Layout | Linear, with one image visible at any given moment | Horizontal or circular layout, showing multiple images in a sliding format |
| Use Case | Ideal for focusing on individual images or highlighting one element at a time | Best for showcasing a series or group of related images in a compact format |
| Transition Effects | Often includes fade, slide, or zoom effects | Primarily horizontal sliding of multiple images |
How to Create an Image Carousel in WordPress: Step-by-Step Guide
By default, the Gutenberg editor doesn’t have the carousel block. So, you have to depend on a third-party plugin to create image sliders for the WordPress editor. In this tutorial, I will use a multi-purpose plugin to explain the process of how to create an image carousel in WordPress. Let’s explore!
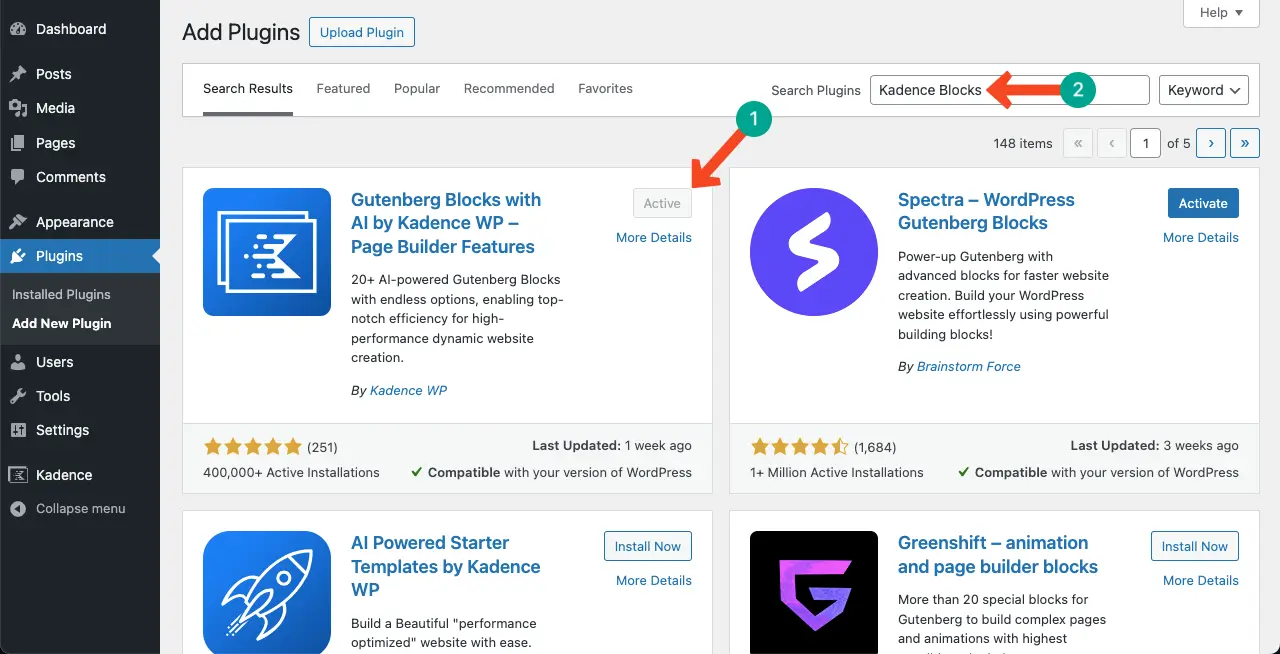
Step 01: Install and Activate the Kadence WP Block Plugin
Kadence Block is a multi-purpose WordPress plugin with 15 custom blocks. One of them is the Gallery block. With this block, not only can you create galleries but also carousels and sliders, even with the free version.
So, install and activate the plugin on your website.
Here’s a comprehensive review of the Kadence Block plugin.
Step 02: Add the Gallery (Adv) Block to the Gutenberg Editor
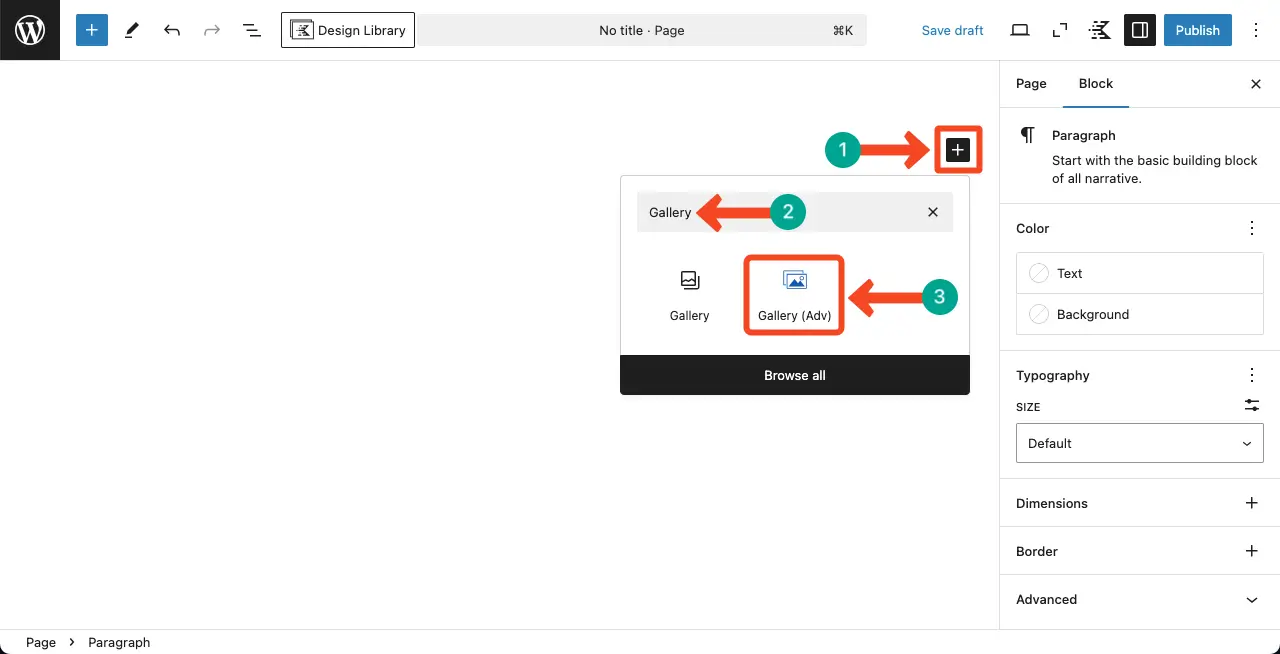
Open the post/page where you want to create the image carousel. Then, click the plus (+) icon on the editor.
Type Gallery (Adv) in the search bar. Once the block appears, add it to the editor.
Step 02: Add Images to the Block
Once the block is added, you’ll get the option to add images. Click the + Select Images button.
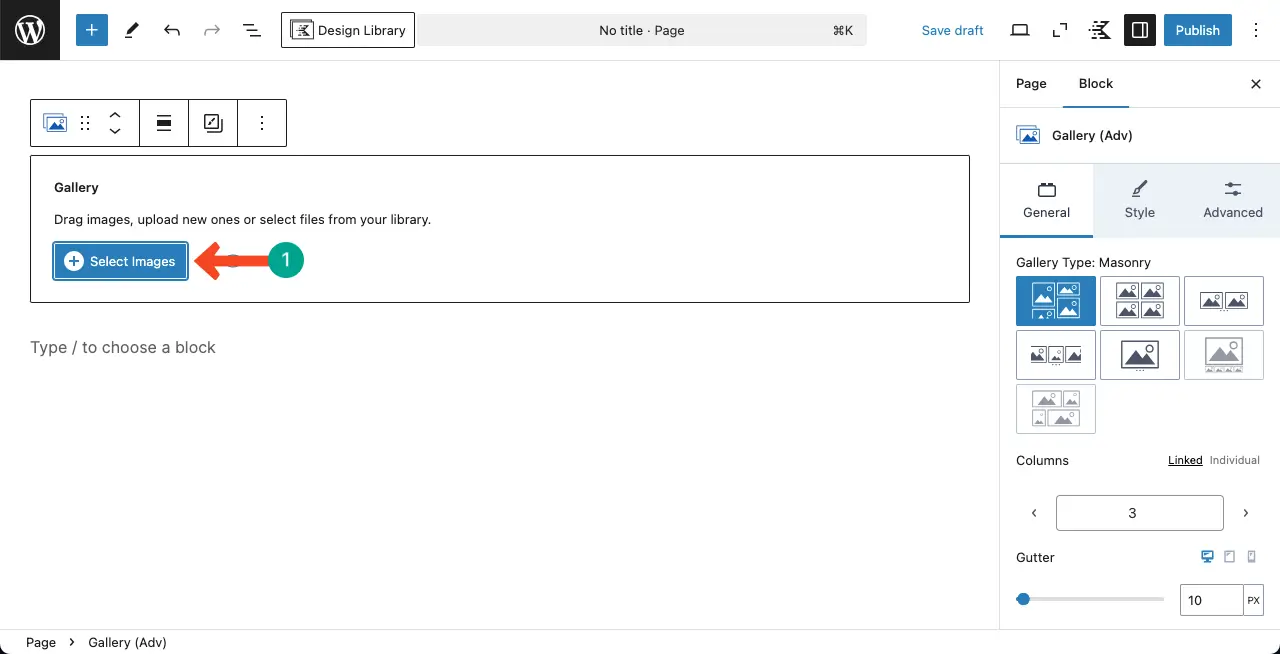
You can upload images from the media library or local drive. Once the images are selected, hit the Create a new gallery button.
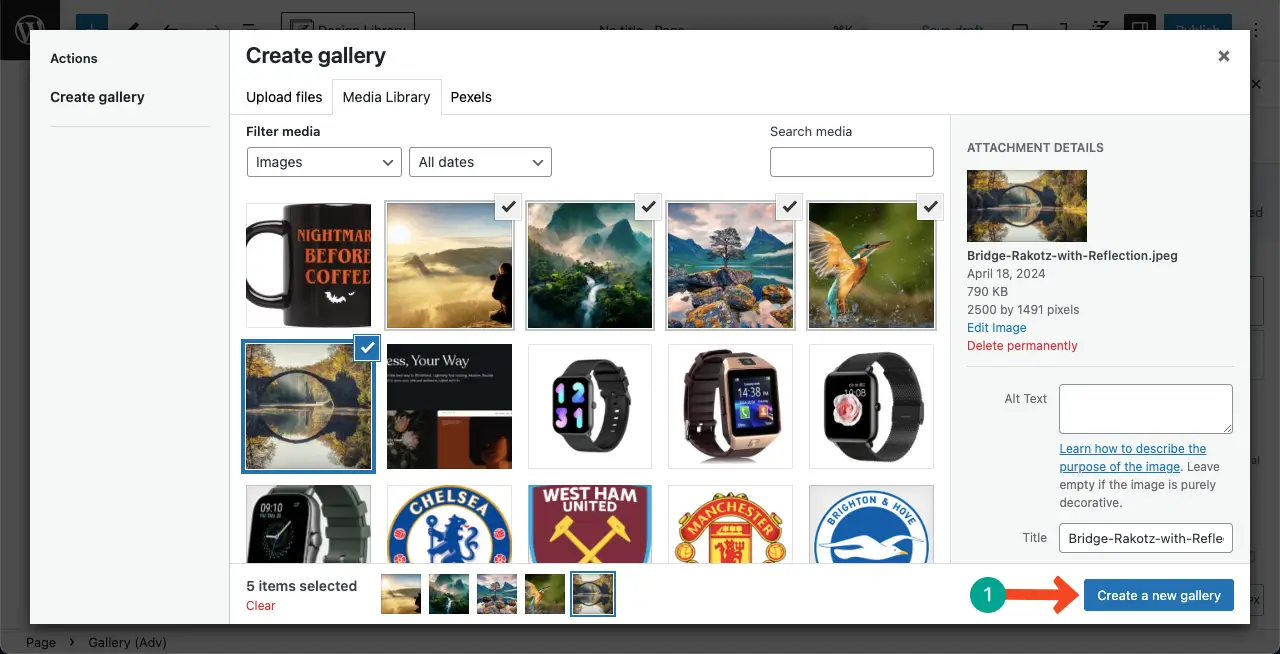
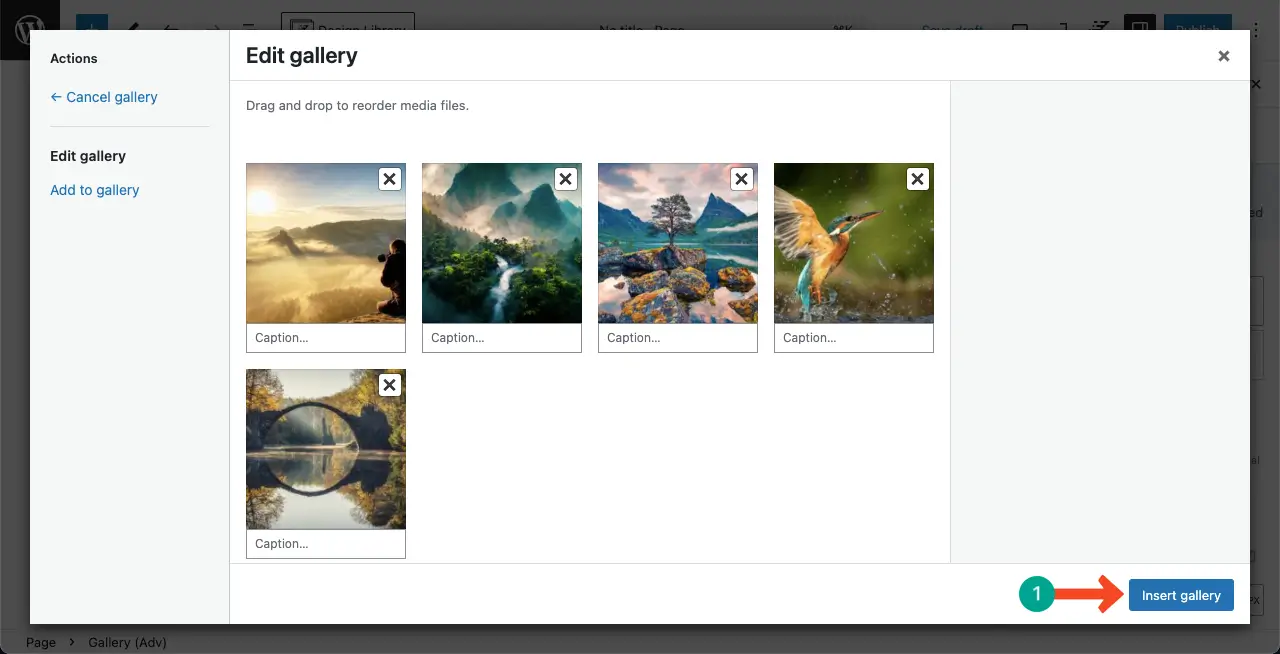
You may add captions to the images. It’s optional. So, you may avoid adding captions. If there is any image you don’t want to go with, you may delete it from this stage as well. Finally, click the Insert gallery button.
You’ll see the selected images appearing in the editor.
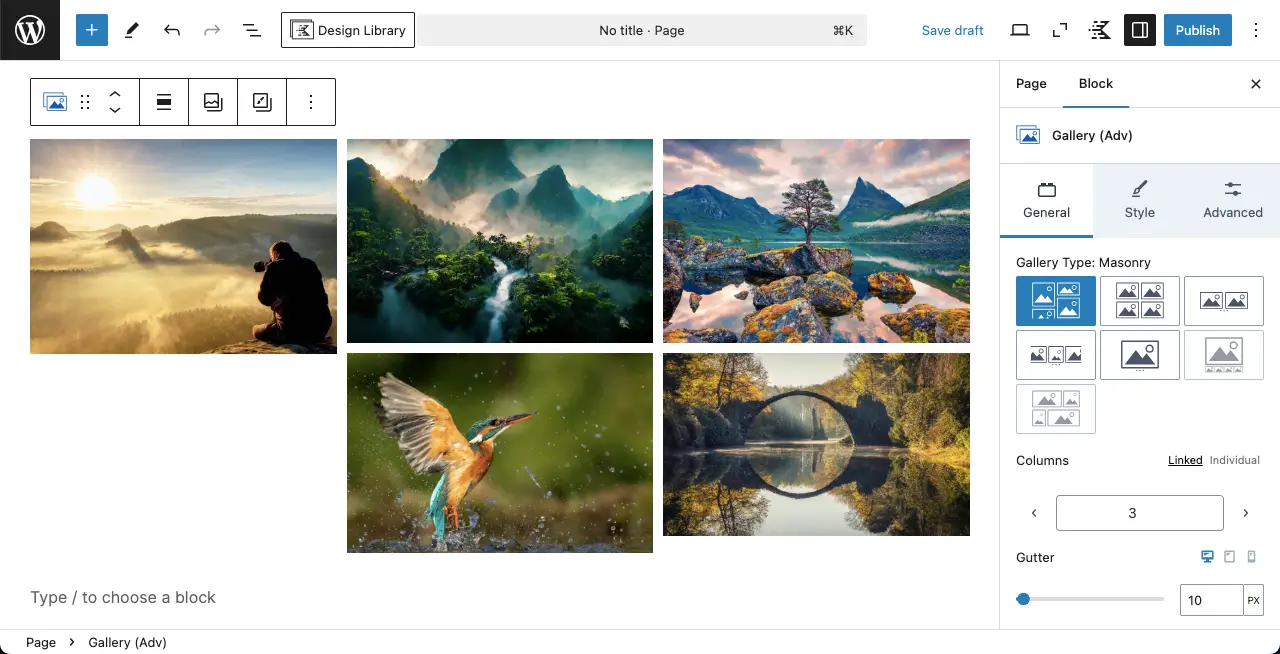
Step 03: Display Images in the Carousel Format
Under the General tab, you’ll see several gallery types. Among them, you’ll get two Carousel options.
Select the carousel format you like. The images will immediately be arranged and displayed in that format.
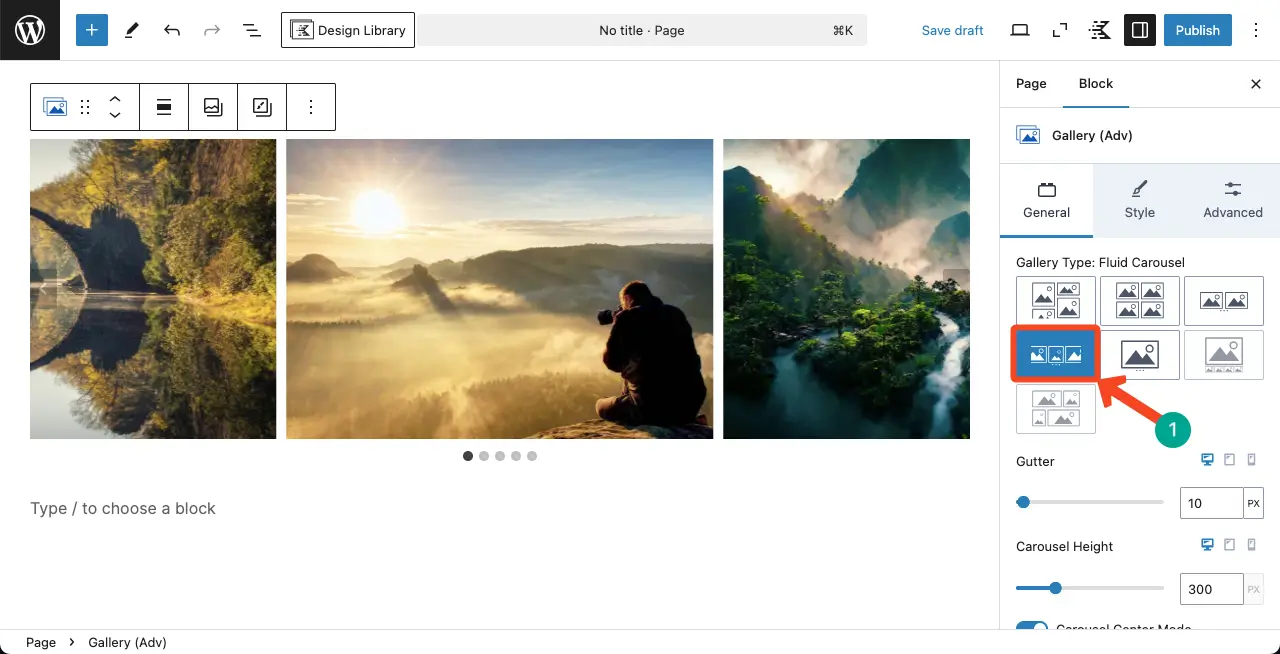
Step 04: Configure the Carousel Settings
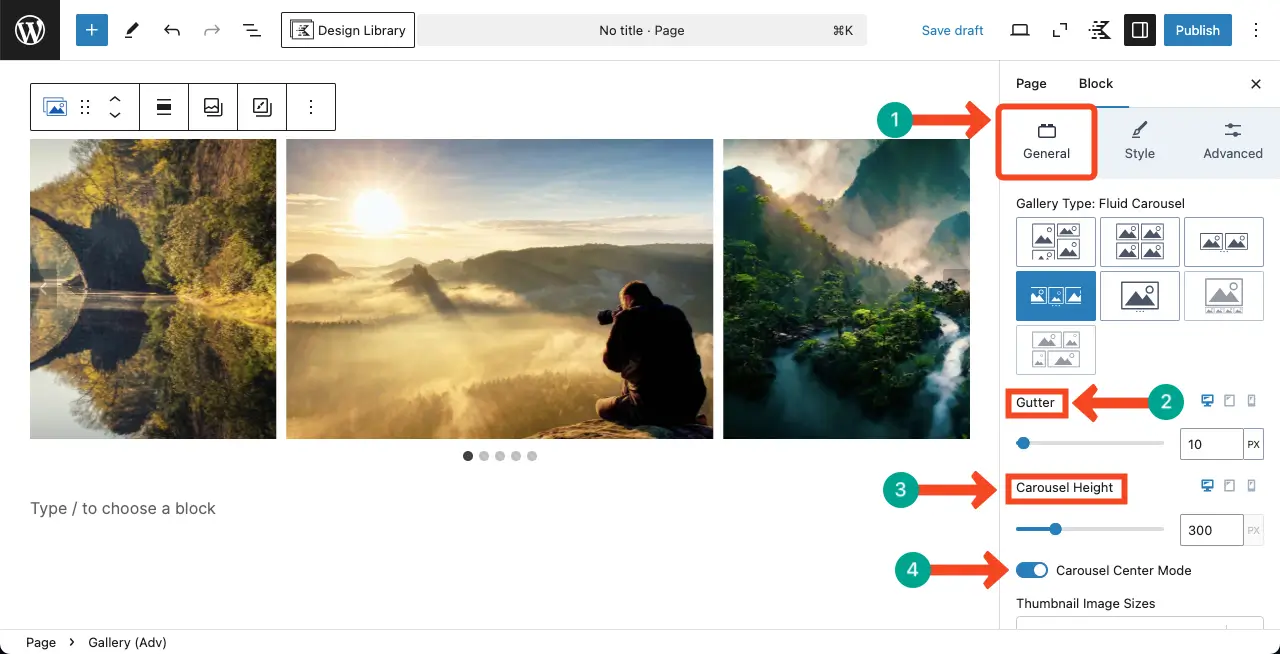
Come to the General tab again. Under this tab, you’ll get numerous options to configure settings for the carousel.
Gutter – Set spaces between the images in the carousel.
Carousel Height – Specify the height for the carousel. As you change the height, the number of images displayed in the carousel will also change.
Carousel Center Mode – Enabling/disabling it changes the carousel position on the editor.
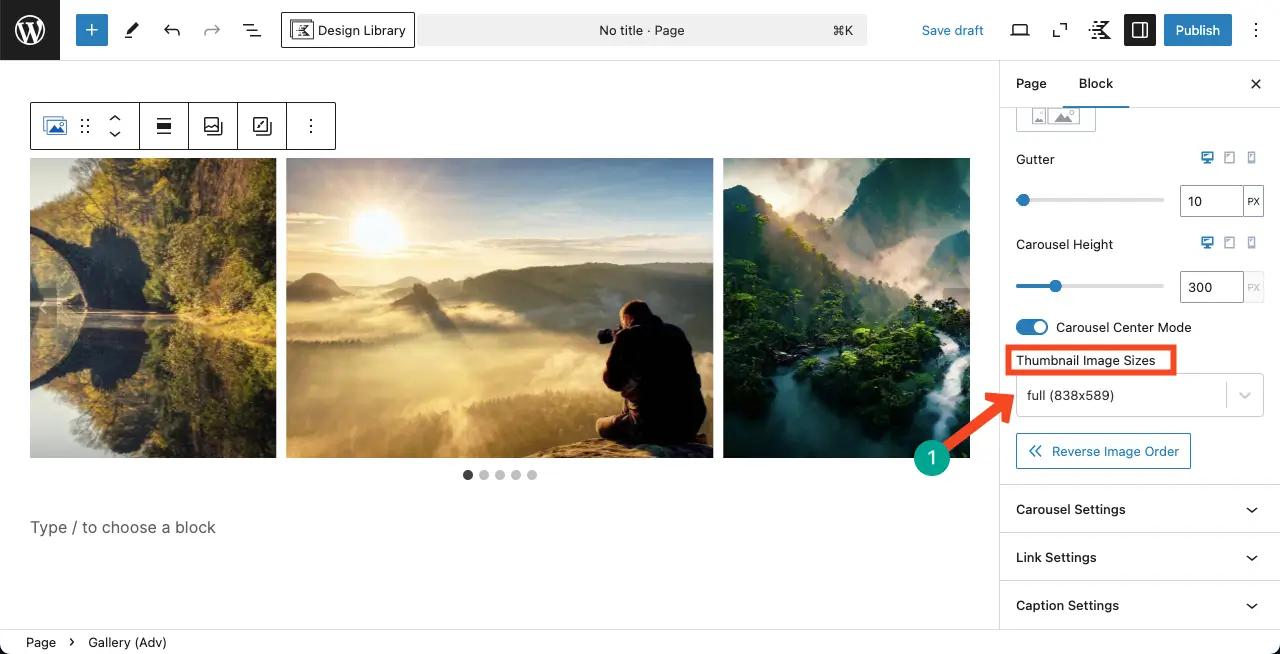
Scrolling down a bit, you’ll see the Thumbnail Image Sizes. From this option, you can change the image size for the carousel or stay with the default one.
For this tutorial, I have selected the full size.
Step 05: Autoplay the Carousel
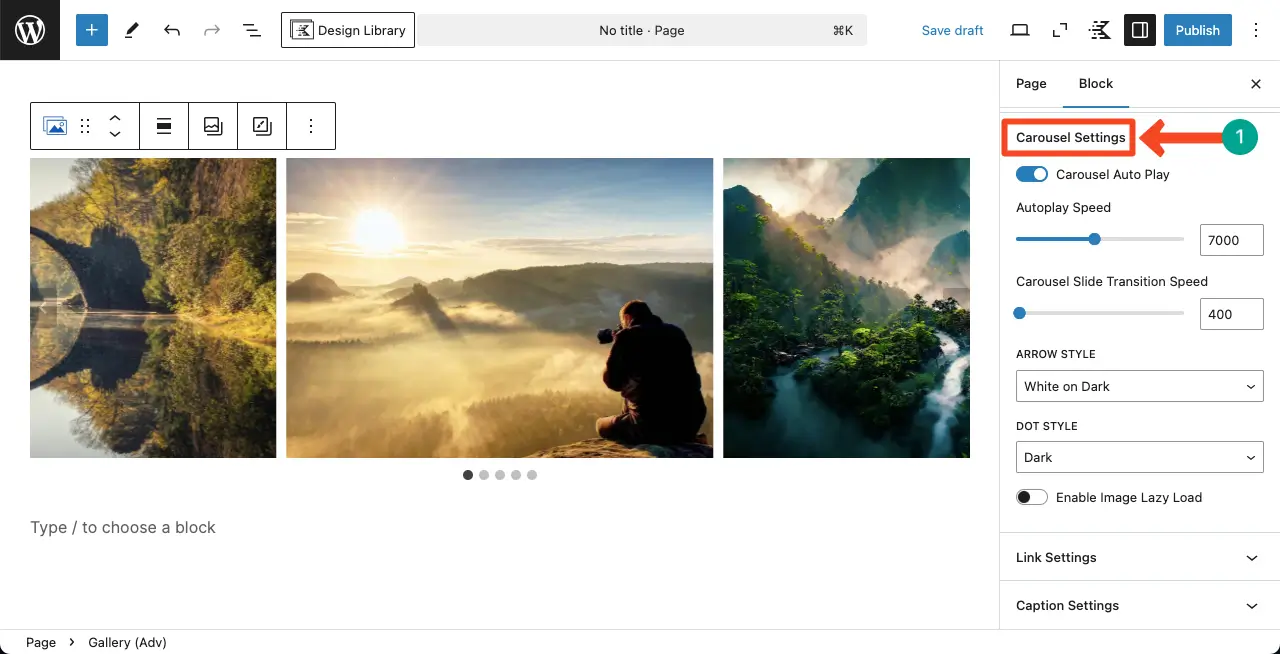
Scroll down further below and come to the Carousel Settings section. By expanding it, you’ll see several more options. They are:
Carousel Auto Play – Toggle on to enable autoplay for the carousel.
Autoplay Speed – Set the autoplay speed for the carousel.
Carousel Slide Transition Speed – Specify the transition speed.
Arrow Style – Select the arrow style you want to display on the carousel.
Dot Style – Similarly, choose a dot style for the carousel.
Lazy Load – Hope you know what lazy load is. If felt necessary, you can enable this option.
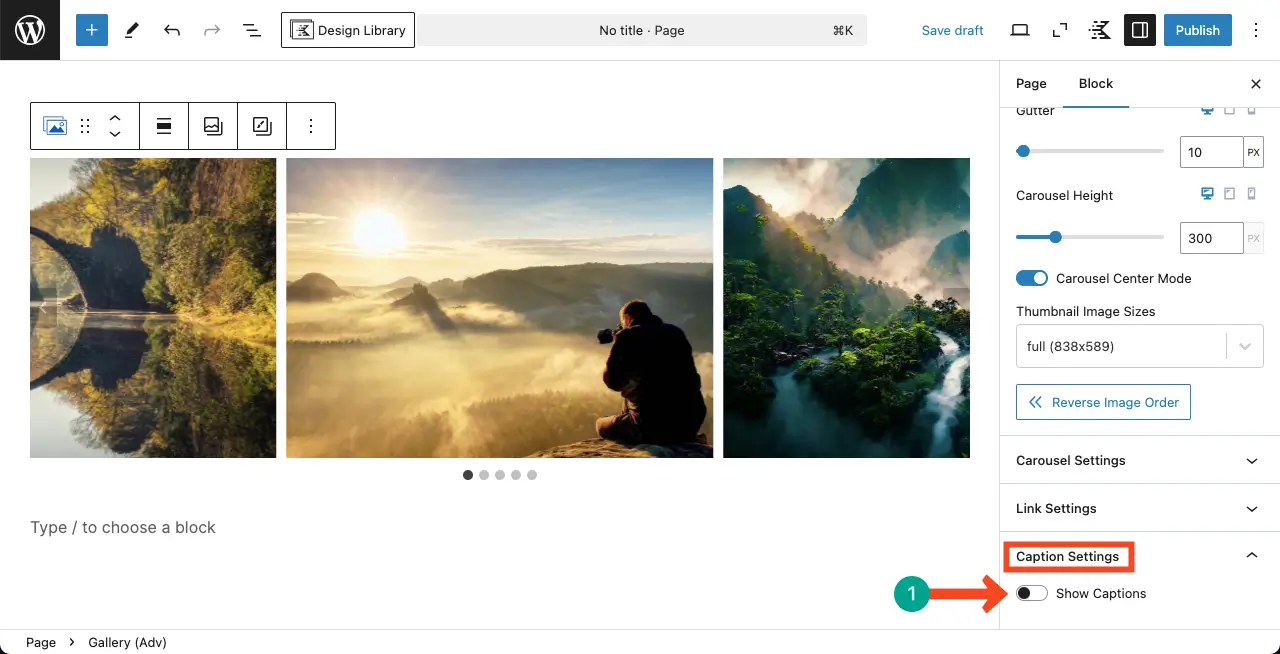
If felt essential, you can display captions for the carousel images by enabling the Show Captions option.
Step 06: Stylize the Image Carousel
Come to the Style tab. You’ll find two options in the tab. They are Border Radius and Image Filter.
Add a radius to the image corners of the carousel. By default, the block doesn’t add any radius to the image borders.
For this tutorial, we have set the radius value 10 for each corner of the images. You may even add separate values for each corner.
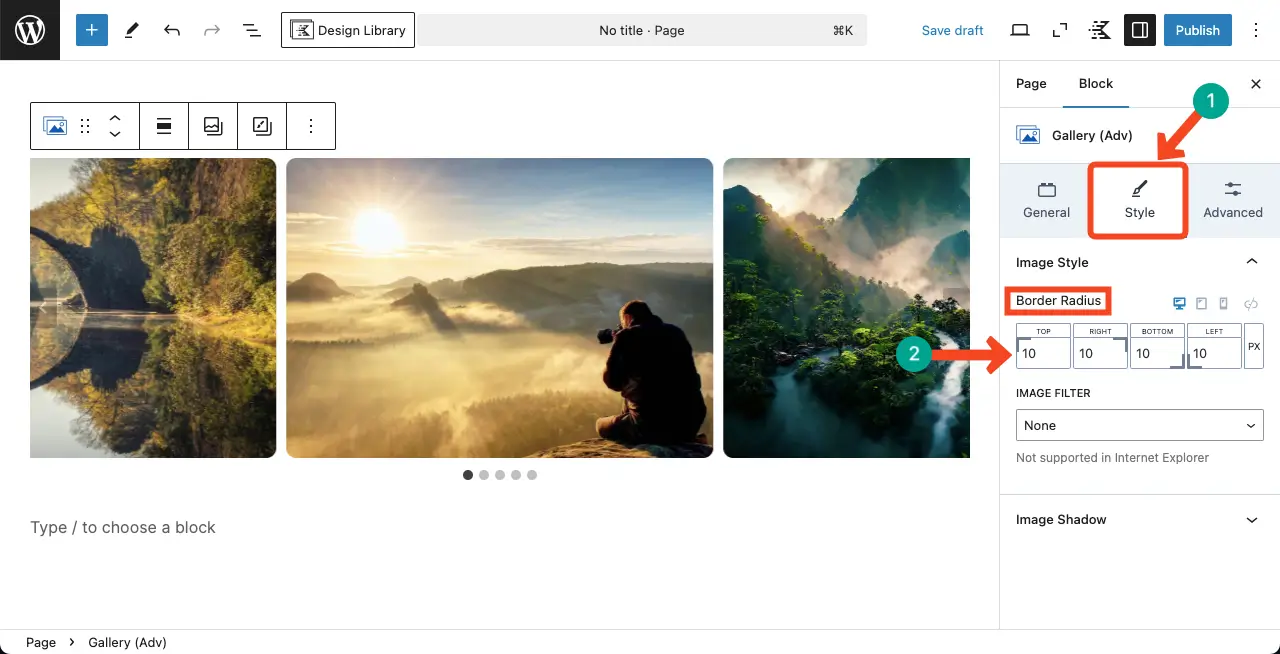
The Image Filter option will let you colorize the images of the carousel. I have explained it in the video clip attached below.
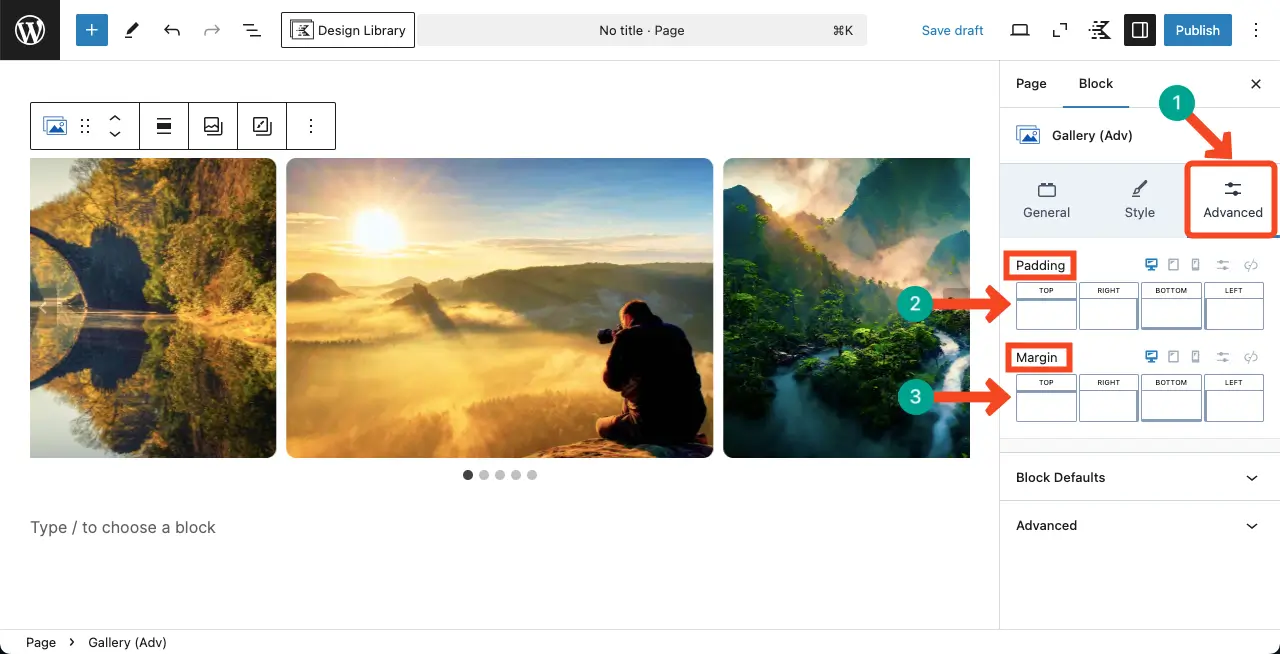
Step 07: Add Padding and Margin to the Block
Come to the Advanced tab. It will allow you to add padding and margin to the block. Do the needful customizations as you desire.
Step 08: Make the Image Carousel Mobile Responsive
You’ll get the option to see your image cursor block’s layout on different screen sizes. Click on the tablet and mobile screen options to check how your carousel looks on different screen sizes.
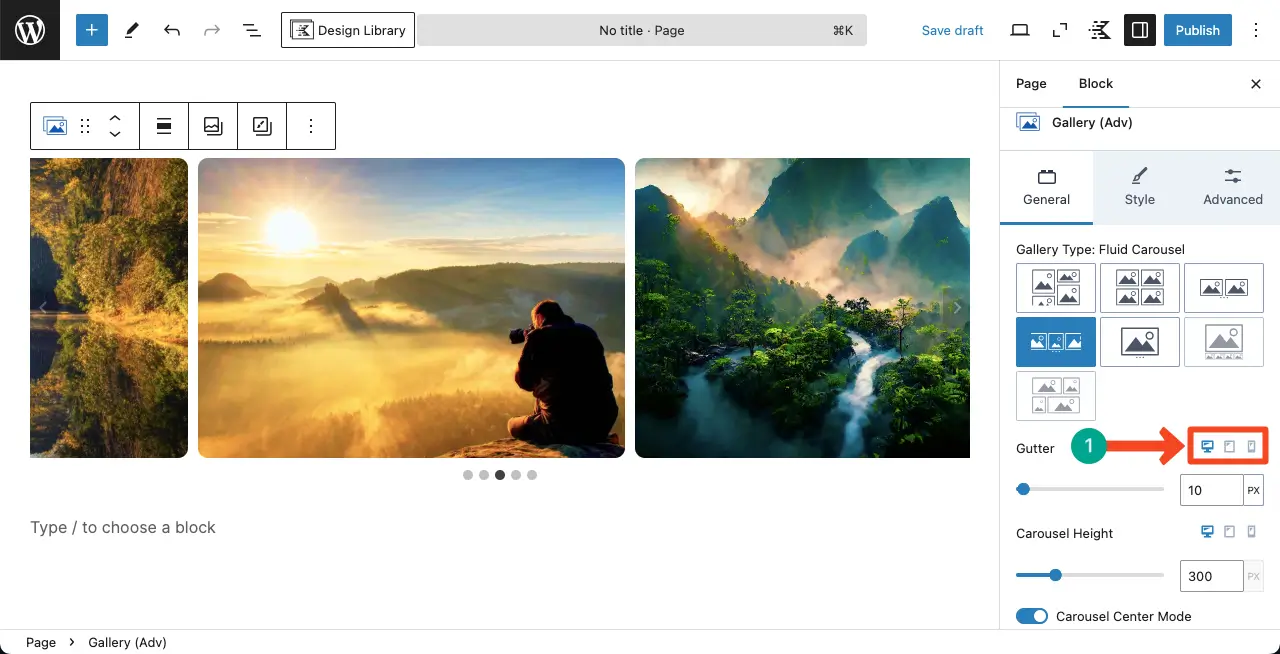
You can even set separate settings and stylizations for different screen sizes if you want.
For this, you need to set the settings and stylization while the screen size is selected. For example, you need to customize the layout for mobile devices while the mobile screen option is selected.
See the video clip attached below.
Thus, you can create an image carousel on your WordPress site simply without much technical knowledge.
Check this guide on how to add alt text to images in WordPress.
Closing Up!
Hope you enjoyed this tutorial. However, there are some more things you can consider while creating image carousels on your website.
For example, to get the most out of your image carousel, it’s important to compress images to maximize page load speed, be responsive on mobile, and provide easy navigation.
Don’t over-stock the carousel with images; test it regularly on different devices to ensure accessibility. If properly set up and constructed, a photo carousel can serve to add a visual dimension to your WordPress website and impress your visitors.

