

By adding the Gutenberg Author block to your posts, you can display the author’s valuable information, which can add credibility to your content. Readers are more likely to trust content when they know who wrote it. It humanizes the content and establishes a personal connection with the audience.
By properly using the block, you can ensure that each piece of content is correctly attributed to its creator. In this tutorial post, I will show you how to use the Gutenberg Author block in WordPress. Let’s begin without any further delay.
What is the Gutenberg Author Block in WordPress?
The Gutenberg Author block allows website owners and bloggers to easily display information about the author of a particular post or page. It provides a user-friendly interface that allows you to customize the author’s information according to your preferences.
You can easily customize the author’s name, biography, profile picture, and social media links directly from the block editor. This flexibility ensures that you can create an author block that aligns with your website’s design and branding.
How to Use the Gutenberg Author Block in WordPress
Before using the Gutenberg Author block, you have to create respective user accounts in the backend, modifying them with the necessary information and the avatar. I will show that first. Next, I will explain how to use the author block.
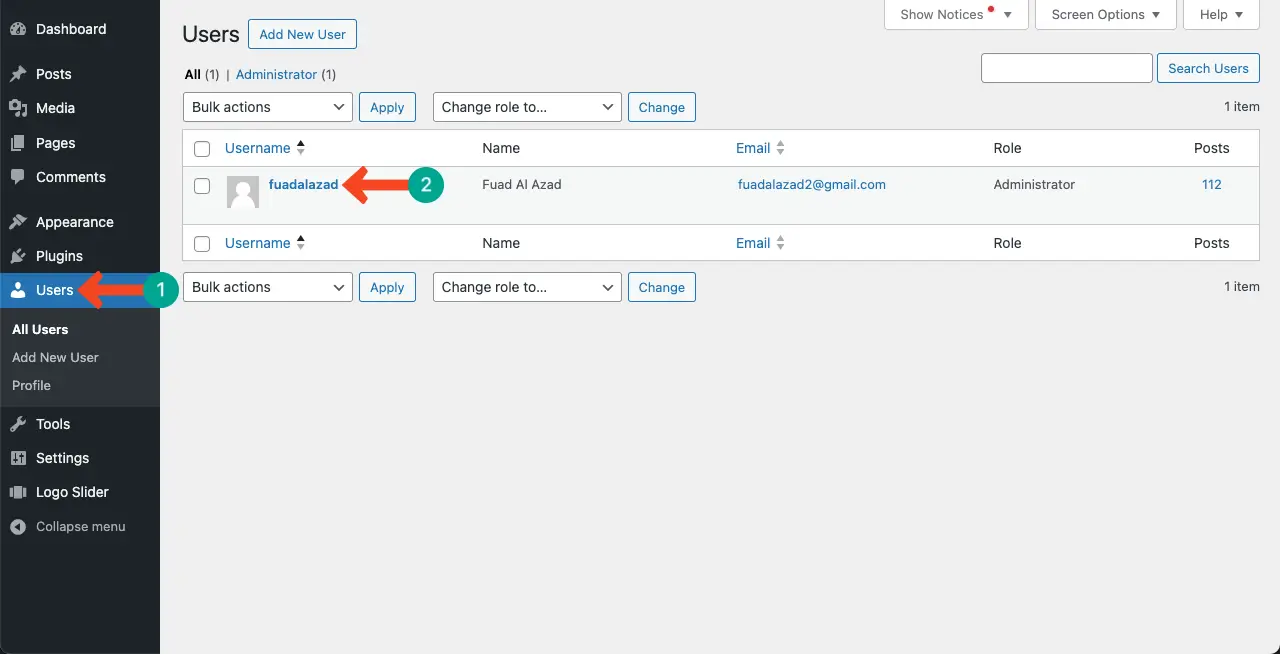
Step 01: Create a User Account(s)
Go to WP Dashboard > Users.
Note: You’ll see a default user is already there. You have to mention a name while opening a website. This name is usually similar to the domain address. This user account is created under that name.
For example, since the domain of my site is fuadalazad.com, this user account is also named fuadalazad. If the domain name were, amazon.com, the user account would be amazon.
You may go with the existing account or create new user accounts. Some websites have multiple authors. In this case, you have to create an account for each author.
Click the Add New User button to create new user accounts. But for today’s tutorial, I will go with the existing account.
Scrolling down the page, come to the About Yourself section. Fill up the Biographical Info and Profile Picture boxes.
- Biographical Info – Write a short bio about yourself in the Biographical Info.
- Profile Picture – Add an avatar to the Profile Picture by clicking the marked link.

You can see that I have filled up the boxes with the required information in the image below. The avatar is also shown up.
Next, you may generate and set a new password, or go with the existing one. Come to the end of the page and save all the settings by clicking the Update Profile button.
Step 02: Add the Author Block to the Gutenberg Editor
Open the post to which you want to display the author’s information. Find and add the Author block to the editor in a suitable place like any other block.

The block will be added to the editor in a second.

Step 03: Customize the Gutenberg Author Block’s Interface
Enable the options Show avatar, Avatar Size, Show bio, Link author name to author page, and Open in a new tab. You’ll see the respective changes in the editor.
Note: The Author bio you added in the backend will automatically be displayed on the Show bio option once you add the block.
Only the Write byline.. field remains blank. What will you add here? Let’s add your user role in the field.

There are six user roles in WordPress. They are Super Admin, Administrator, Editor, Author, Contributor, and Subscriber.
I have added Administrator in the Write byline field. This can help visitors understand the author’s role in this website.

Step 04: Stylize the WordPress Author Block
Get into the Styles tab on the right sidebar.
You can update the text color, background color, filters, and typography of the Gutenberg Author block on the editor.

Thus, you can utilize the WordPress Author block very perfectly.
Best Practices for the WordPress Author Block
When using the WordPress Author block, there are several best practices you can consider to make the most out of it. I have covered the most impactful of them below.
1. Complete Your Author Profile
I encourage you to fill out your profiles with relevant information such as your name, bio, social media links, and a profile picture. An incomplete profile can’t add credibility and makes it easier for readers to connect with you.
2. Use a Professional Profile Picture
Including a professional and high-quality profile picture can make a significant impact on the author block. Choose a clear and well-lit image that represents your authorship appropriately. Avoid using overly casual or unrelated pictures.
3. Provide Relevant Links
In the author block, it’s a good practice to include links to the author’s social media profiles or website. This helps readers connect with the author and explore more of their work. In this case, you have to use the WordPress Social Icon block alongside the Author block.
4. Update the Author Information Regularly
If you have multiple authors on your website or if your author information changes over time, make sure to update the author block accordingly. Keep the information accurate and up-to-date to maintain credibility and avoid any confusion.
5. Link to Author Archives
If your theme supports it, consider linking your author name to your author archive page. This allows readers to explore more content by the same author, increasing engagement and promoting discoverability.
Final Notes!
In this post, I have covered all the essential steps to use the WordPress Author block in full detail. It’s now your turn to use it. But remember to keep the information concise, customize the design to match your website’s style, and regularly update the author block to reflect any changes.
By implementing the best practices we’ve discussed, you can create an author block that not only informs but also encourages your audience to further connect with you or your team. Stay with me to learn how to use the other WordPress blocks as well.

